Build (daddelkischde 2)
This guide will show you how to assemble the boards of the daddelkischde 2 and modify your case to fit everything. Follow the instructions step by step from top to bottom to avoid missing out on important steps or hints. We recommend to read this guide completely before you start to get a good overview.
It makes sense to already install and configure the operating system (RetroPie) before assembling. Then sound and display will work the first time you turn it on. The configuration guide is here.
Important: Before working with the boards, ground yourself to prevent damage to the electronics caused by electrostatic discharge. Ideally, you use a grounding bracelet. But you can also briefly touch a heater or the metal housing of a computer before touching the boards. Nevertheless, you should avoid touching the components directly on the boards.
Important notes about the battery
The daddelkischde 2 must always be operated with a battery, not only by external power supply! The charging circuit can be destroyed if no battery is connected.
Even if the daddelkischde 2 is switched off by a switch, the charging circuit is still powered by the battery. This serves to charge the daddelkischde 2 in the off state. The consumption is only a few milliamps. Nevertheless, the battery should be disconnected if the daddelkischde is not used for a long time.
For charging, a power supply unit with at least 1 A output power should be used.
Do not connect high-consumption devices directly to the external USB port. So no external hard drives, wireless sticks, etc. Use an actively powered USB hub, so as not to stress the battery too much.
The battery should have enough space in the battery compartment. LiPos can expand and in the worst case explode if they do not have the space! Therefore, there should always be a few millimeters of air around the battery.
Parts and tools
You need these parts to build a complete Game Boy Zero with the daddelkischde 2:
- daddelkischde 2 kit including pin header and display
- Raspberry Pi Zero (W, WH) or Raspberry Pi 3 A+
- Game Boy case (please do not disassemble an original Game Boy, that would be too bad)
- LiPo battery (3.7 V), fits the battery compartment, with JST plug
- Protective glass for the display
- Speaker (8 ohms, 1 watt, 28 mm)
- Additional buttons and pads for X, Y, L and R (and optionally for C, Z, L2 and R2)
- Stranded wire (AWG 26 for example)
- LEDs (3 mm, red, green, yellow, blue)
- Ausgedruckter Displayhalter
- Printed display holder
- Four M2 flat screws, approx. 6 mm long, for screwing on the shoulder button board (supplied with the purchase of the printed part)
- Five M2×8 flat screws for screwing on the main board (supplied with the purchase)
- Adhesive (two-component epoxy resin)
- Electrical tape or Kapton tape
- Optional: empty cartridge (as dummy) or printed cartridge with air outlet
- Optional, recommended for Raspberry Pi 3 A+: Sunon UB5U3-700 fan and two M1,6×6 flat screws with matching nuts (screws and nuts are included in the order when ordering)
- Optional: PSP1000 thumbstick (drilling template is included with the order in the shop)
- Optional: tacticle button as mode button (6 mm height)
The following tools are needed for assembly:
- Flat-nosed pliers
- Side cutter
- Soldering iron with fine tip
- Step drills
- Dremel
- File
- Multimeter for checking the wiring
Soldering tips
If you are new to soldering, these tips should help you to get a nice and working result. YouTube has many tutorials on soldering. And also at Conrad there is a detailed explanation.
Use a soldering iron with a fine tip. Ideal is a soldering iron, where the temperature can be adjusted. 350° C is a good value. If you do not want to spend a lot of money, the Ersa Multitip C 15 is well suited for entry.
For good results, it is important to clean the soldering iron over and over again. For this we recommend a container with metal wool (available at Conrad). In it, the tip of the soldering iron is stripped off briefly and freed from soldering tin. Then it should shine again.
When soldering, it is important that both solder joints to be joined are heated. For the daddelkischde 2 that would be e.g. the copper ring around the hole and the wire end or the pin of the pin header. Hold the soldering iron shortly at both parts at the same time and then push some soldering tin on the spot. Then move the soldering iron a little and the solder should spread evenly. It should not be used too much and not too little solder.
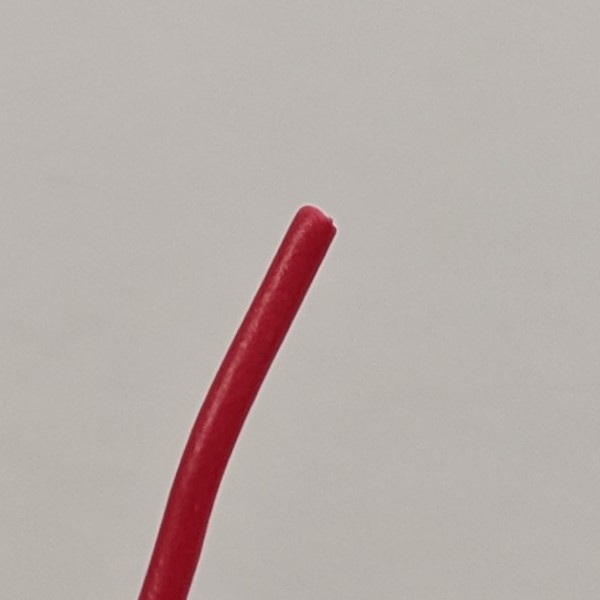
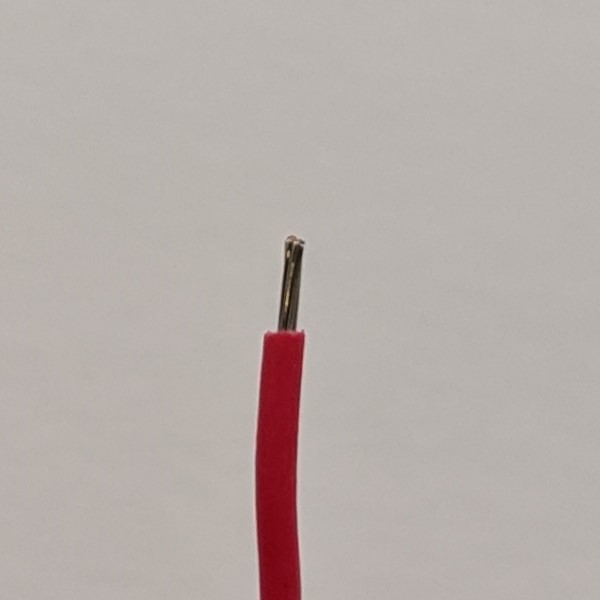
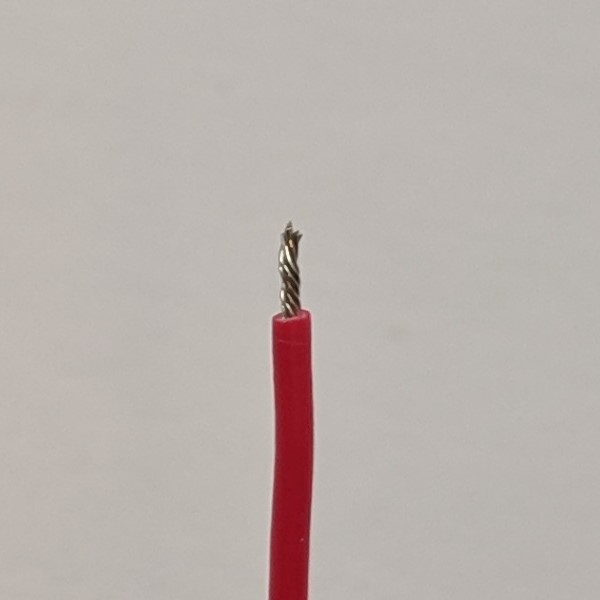
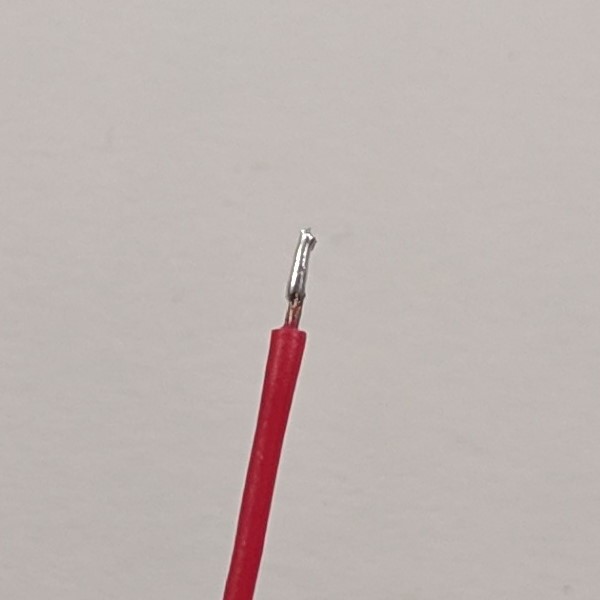
When soldering the wires, we recommend the following procedure:
- Stripping (1a + 1b)
- Twist wires (1c)
- Cover with a little solder (1d)
Board
Separate boards
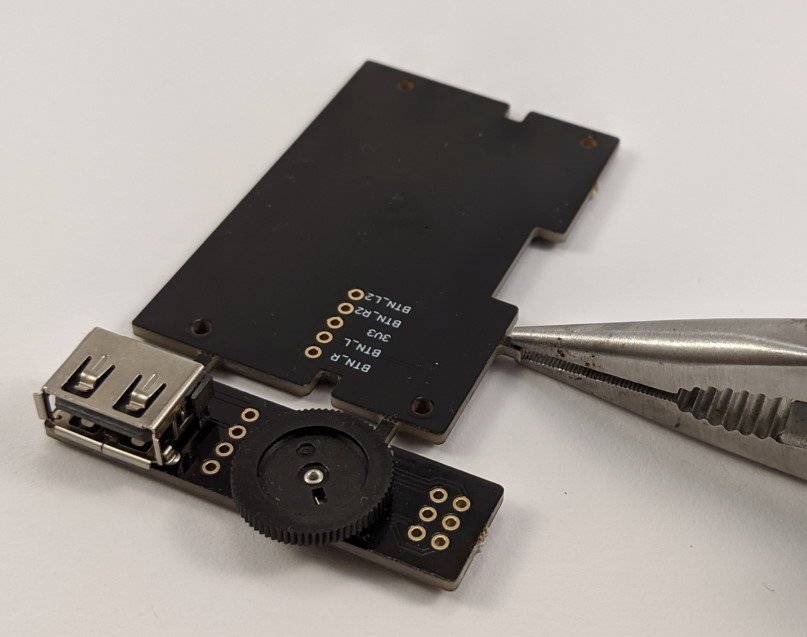
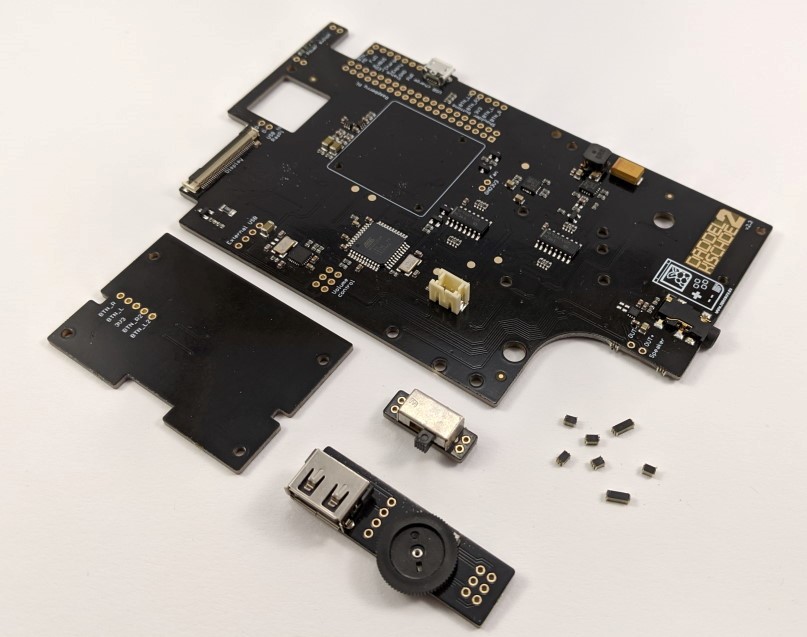
First, the four boards must be separated. Use a flat-nose pliers and break the boards apart at the predetermined breaking points (2a). Make sure that the force acts on the predetermined breaking points and not on the circuit boards themselves! With a file, you can then smooth out the bumps at the fracture points.
Optional: prepare Raspberry Pi 3 A+
Hint: This step is not mandatory and optional. If you are afraid of destroying something or don't have the necessary tools, please skip it.
If you are using a Raspberry Pi 3 A+, we recommend using a fan (Sunon UB5U3-700). The Raspberry Pi 3 A+ runs faster than the Raspberry Pi Zero and therefore also generates more heat, which should be led out of the case.
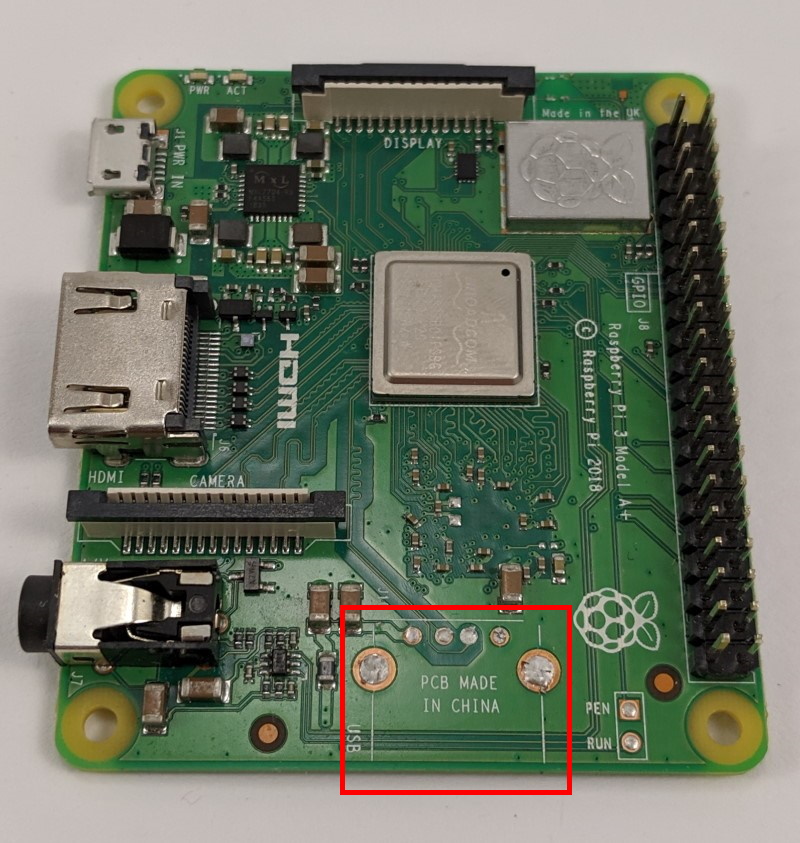
When installing a fan, the airflow blows out of the top of the case. To prevent the airflow being obstructed, the USB socket can be removed from the Raspberry Pi 3 A+. For this purpose, a desoldering pump can be used to release the six pins of the socket (3a). If you have several soldering irons and a helper, all pins can be heated and then the socket can be pulled out.
Optional: fan installation
Important: If you want to use a fan (recommended for the Raspberry Pi 3 A+), then you need to screw it to the main board, before it will be soldered to the Raspberry Pi.
Before installing the fan, you should check that it is working correctly. You can find instructions here.
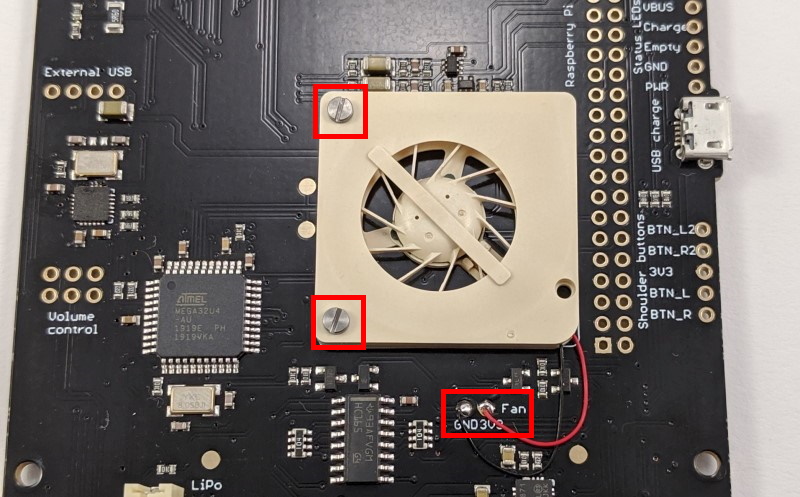
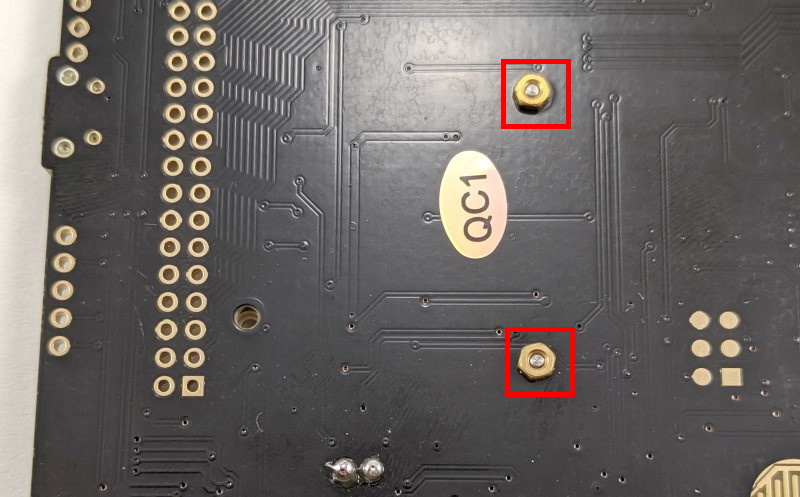
If the Raspberry Pi 3 A+ is used, only two of the three mounting holes can be used (4a + 4b). Screw the fan with M1.6×6 screws and matching nuts as shown in the pictures below. The side air outlet points upwards, towards the large square recess in the circuit board.
Shorten the fan's wires, remove the insulation at the end and solder it to the appropriate places on the main board (labelled "Fan"). The red wire goes to 3V3, the black to GND (4a).
Optional: shorten pin headers
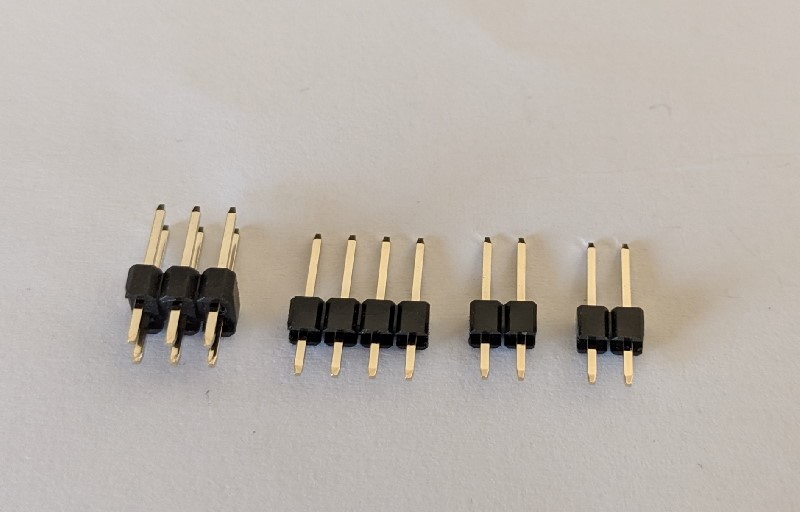
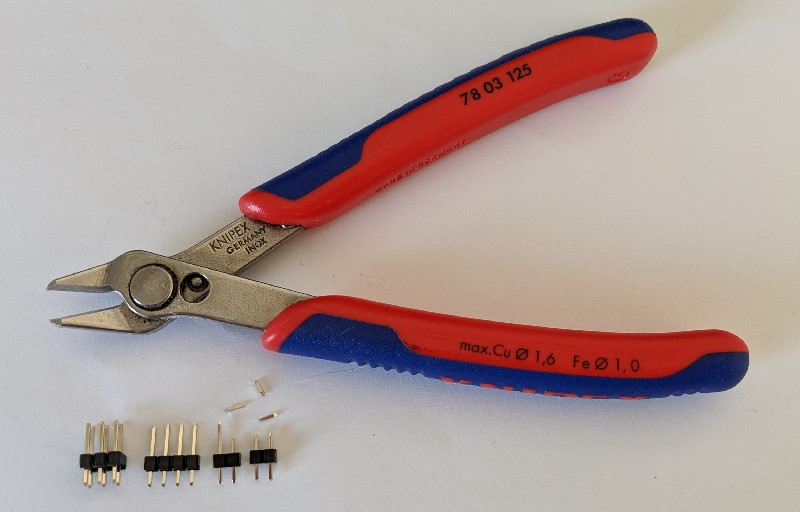
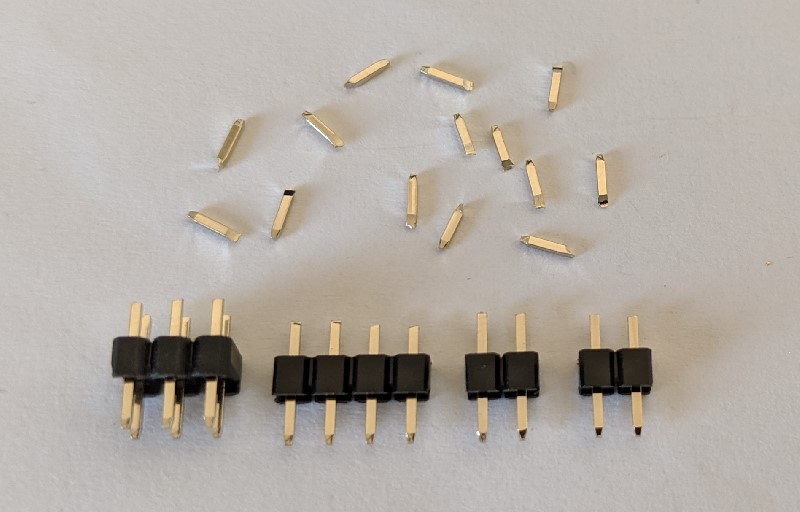
Shorten the supplied two, four, and six-pin headers on the longer side so that both sides are the same length. Do not shorten the 2×20 pin header of the Raspberry Pi! Shortening is not really necessary, but it looks cleaner.
Shortening should be done before soldering. If the pin headers are shortened when already soldered, there is a risk that the board will be damaged by the shearing forces. Use a side cutter to cut the long pins to 3 mm (same length as on the short side). Hold the pin you are cutting. Otherwise it will fly away and in the worst case into your eye!
Solder USB
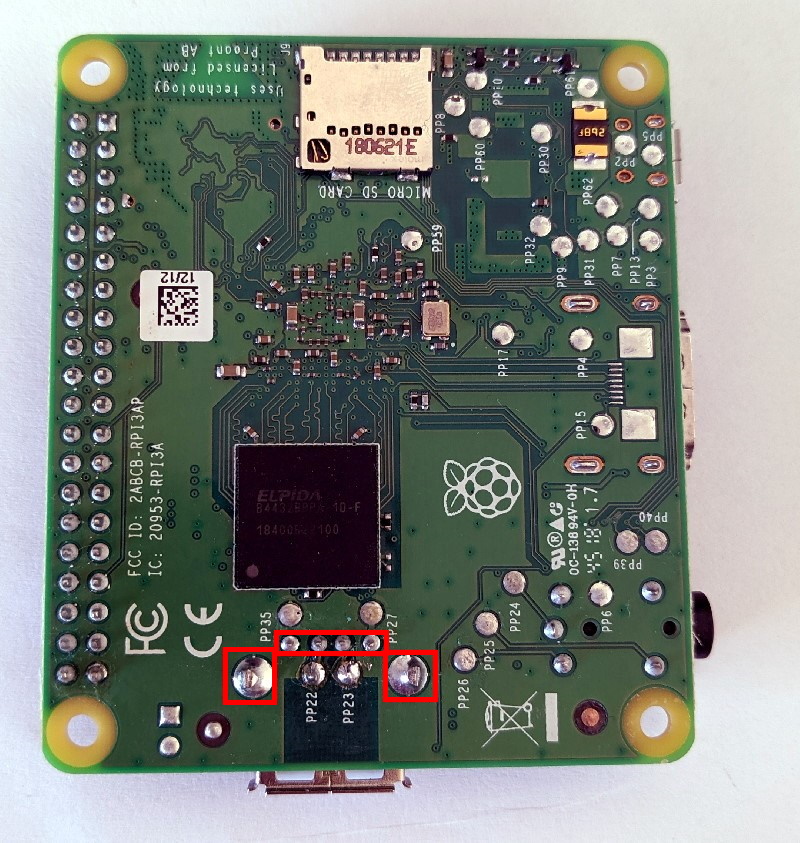
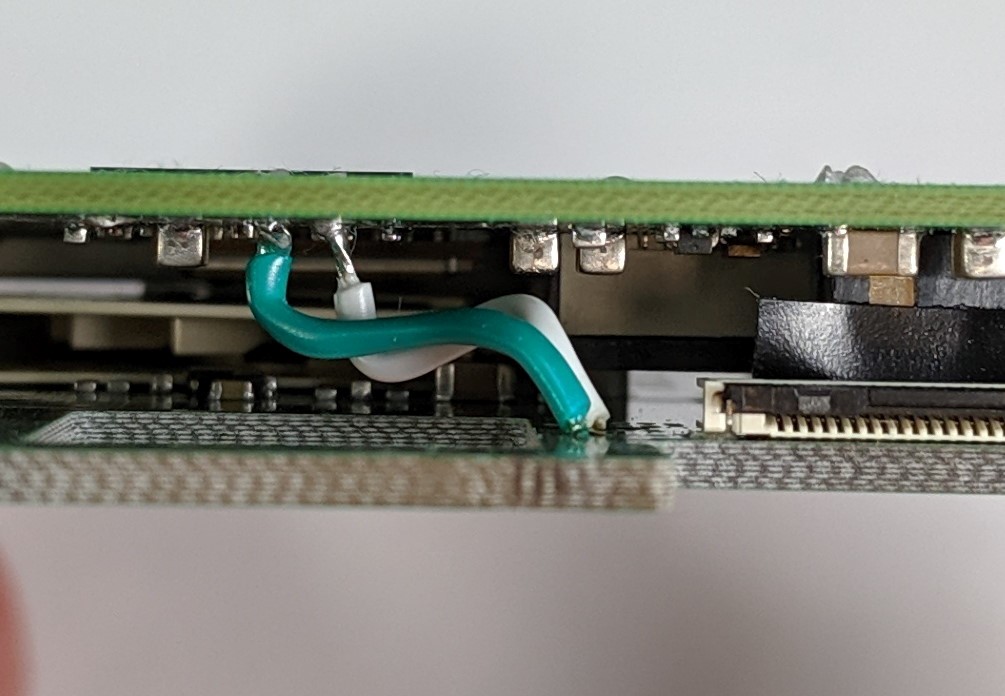
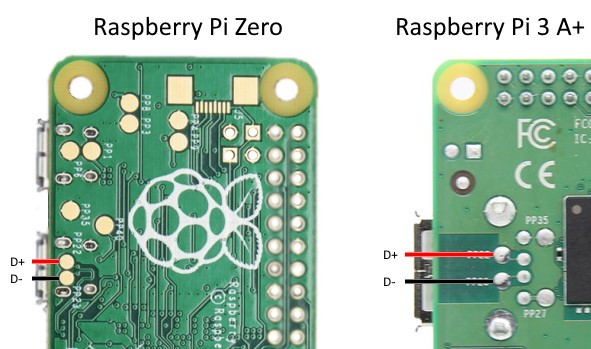
The integrated 2-port USB hub on the daddelkischde 2 is to be connected via two pads (D+ and D-) with wires directly to the Raspberry Pi (6a). The overview diagram 6b shows exactly where the corresponding pads are located on the Raspberry Pi. The USB socket on the Raspberry Pi is thus occupied and can not be used elsewhere.
Before you solder the individual boards in the next step, you should solder the two wires to the Raspberry Pi. Later it gets a little tight on the spot. After assembly in the next step, the open ends of the wires are then soldered to the pads on the daddelkischde 2.
Assembly
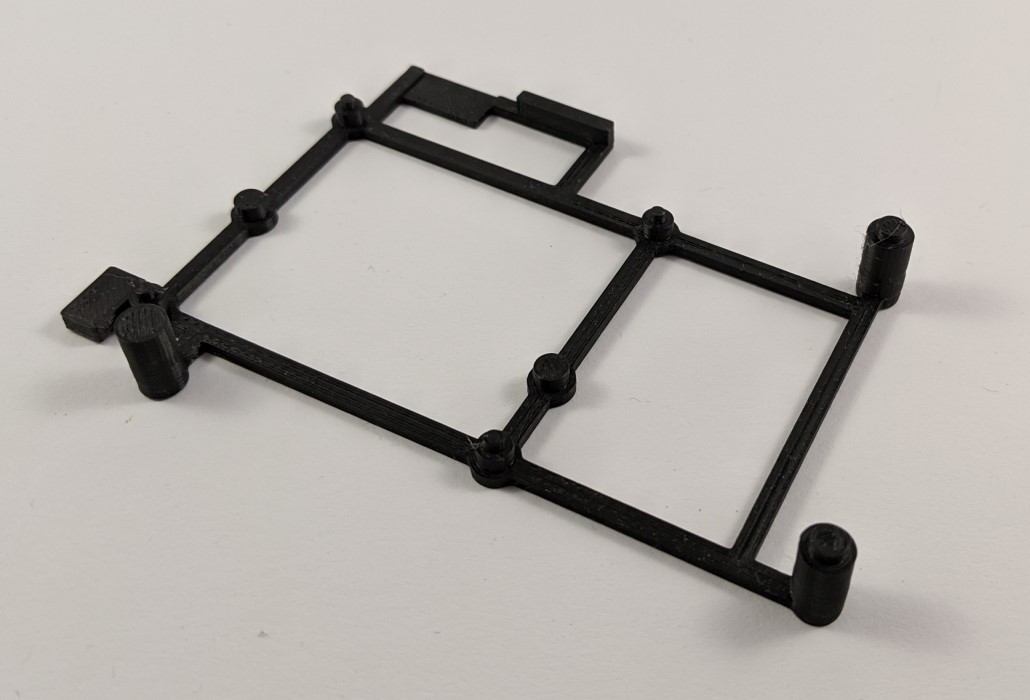
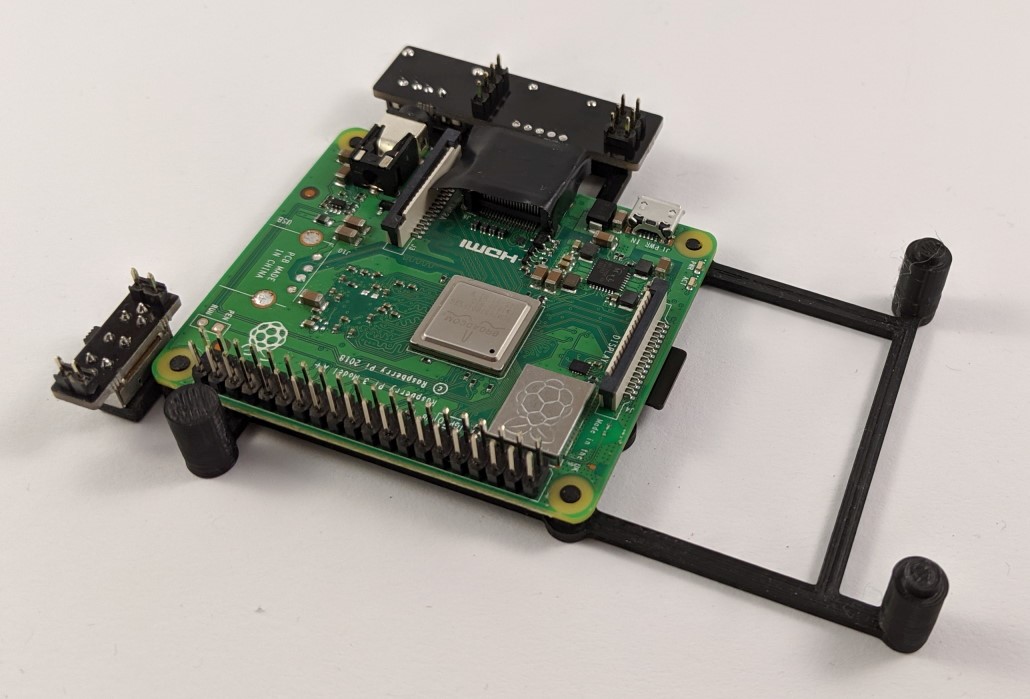
We recommend that you use our assembly helper from the downloads. This makes it easier to assemble the boards with the Raspberry Pi.
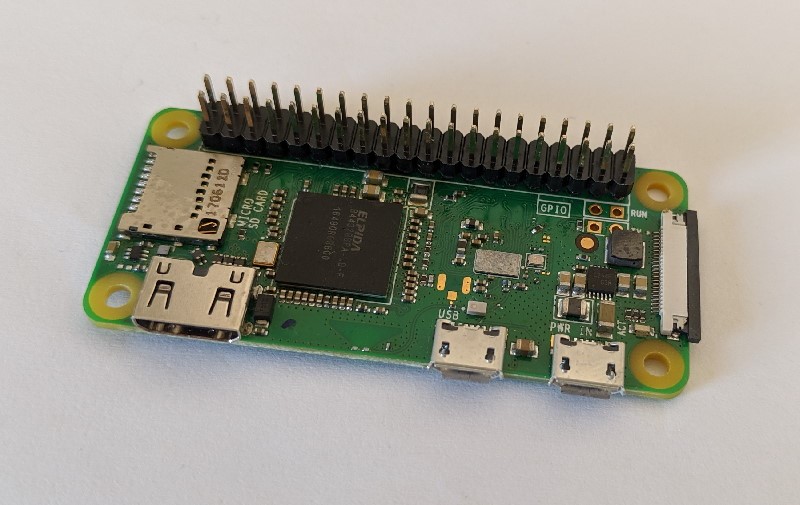
The Raspberry Pi is soldered to the daddelkischde 2 via a pin header. The Raspberry Pi 3 A+ is already equipped with the pin header. If you want to use a Raspberry Pi Zero, you can buy the variant WH, which is already equipped with a pin header. If you are using the Raspberry Pi Zero version W or without a letter, you will need a 2×20 pin header with pitch 2.54 mm. Solder these on the bottom so that the long side of the pins faces up, as shown in the following photo (7a):
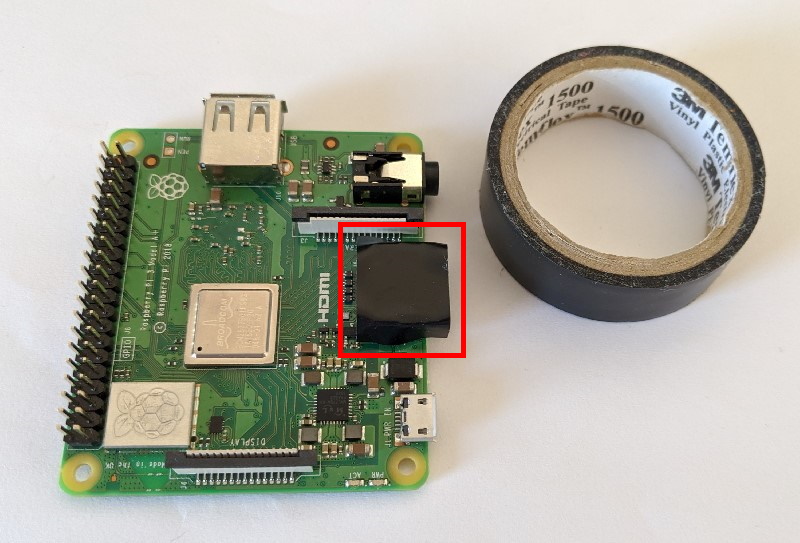
If you are using a Raspberry Pi 3 A+, you should tape the HDMI jack with electrical tape or Kapton tape so that it will not short circuit with the main board (7b).
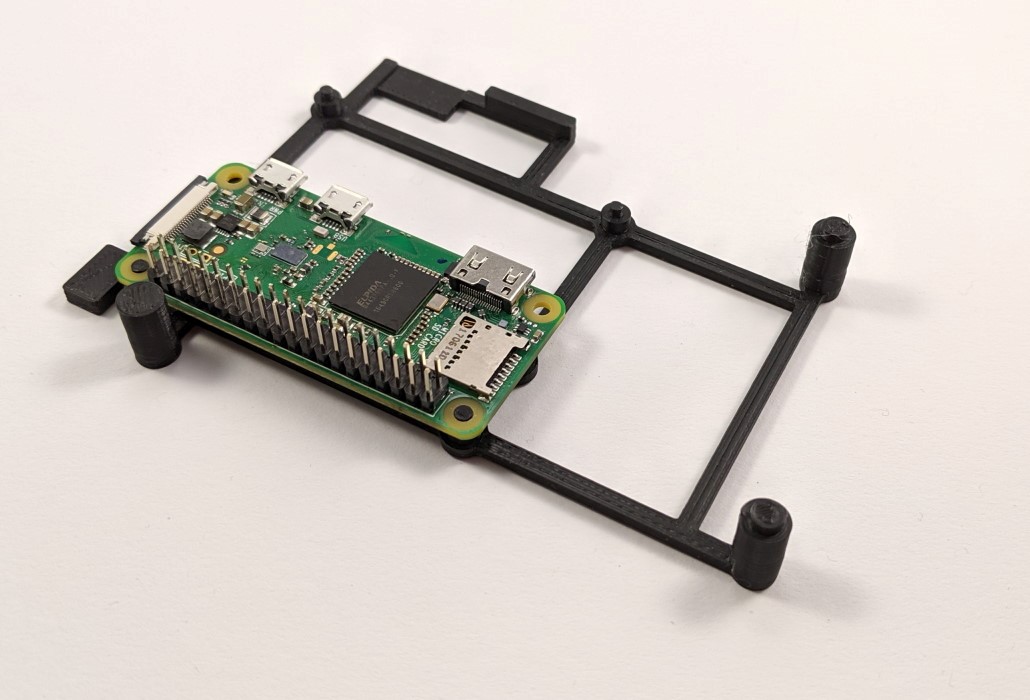
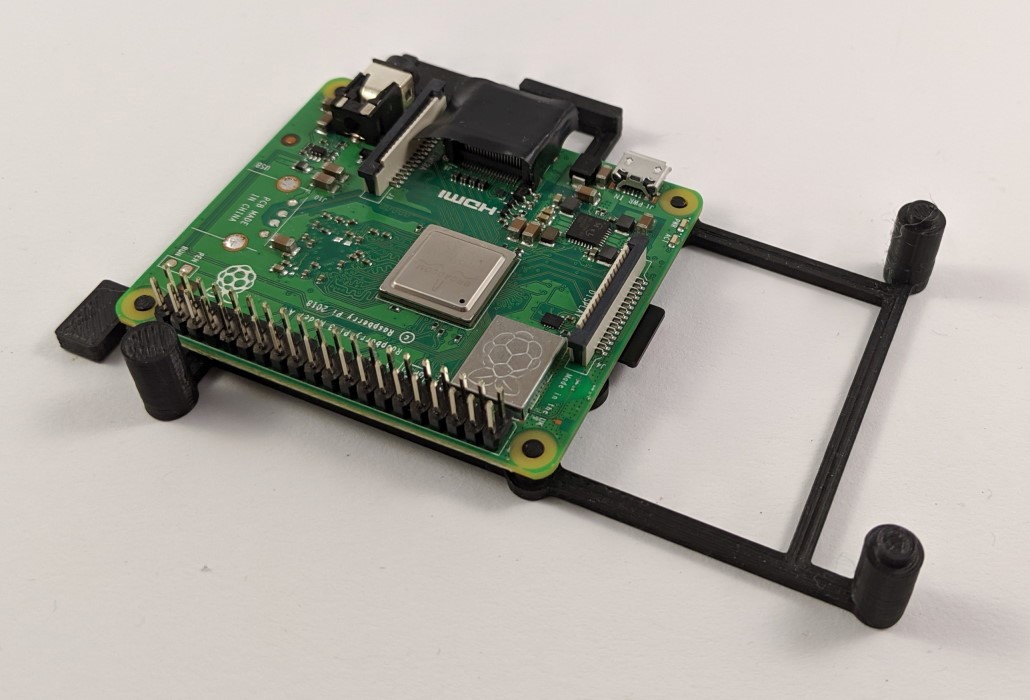
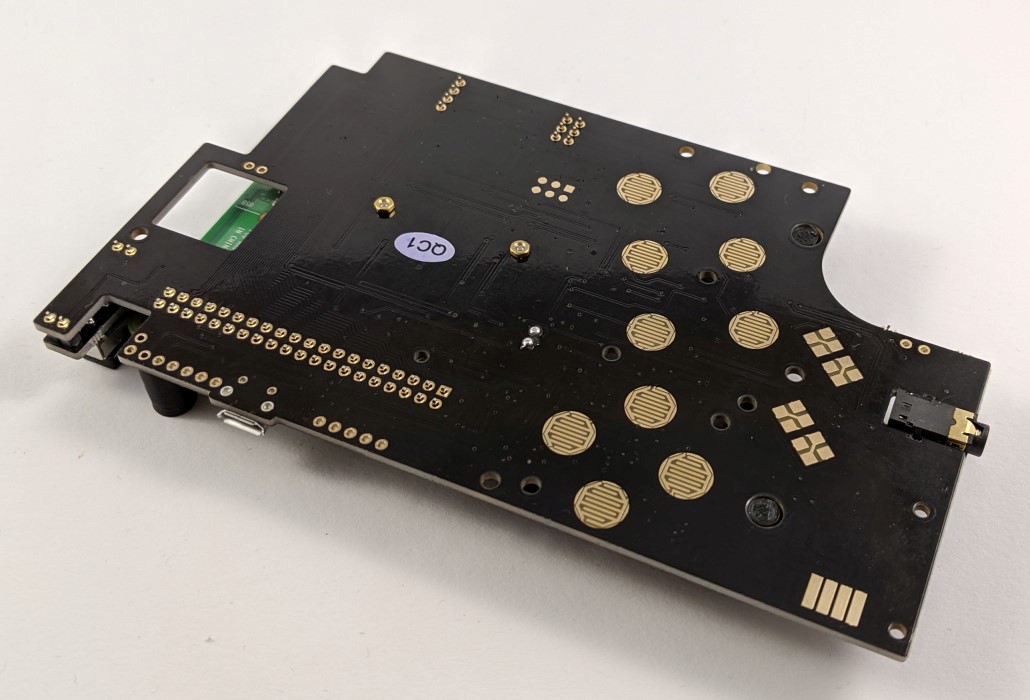
First put the Raspberry Pi in the assembly helper (7d + 7e). Then place the board with USB socket and volume control and the board with the on/off switch to the intended places (7f). Then insert the four supplied pin headers with 1×2, 1×4 and 2×3 pins (7f). If you have not shortened the pin headers, make sure that the short sides are facing up (away from the assembly helper). Finally, the main board is placed from above (7g). All pin headers must look approximately the same height through the holes provided. Then solder the up-facing sides of the pin headers (including the pin header of the Raspberry Pi) to the motherboard.
Now you can turn everything around and remove the assembly helper. Then solder the pin headers to the two boards with USB socket, volume control and on/off switch. Now you can also solder the open ends of the USB wires from the previous step to the daddelkischde 2.
After the Raspberry Pi has been soldered, its USB sockets may no longer be used. This means: Do not connect any USB devices or power supplies directly to the Raspberry Pi! Otherwise the daddelkischde 2 can be damaged.
Re-solder headphone jack
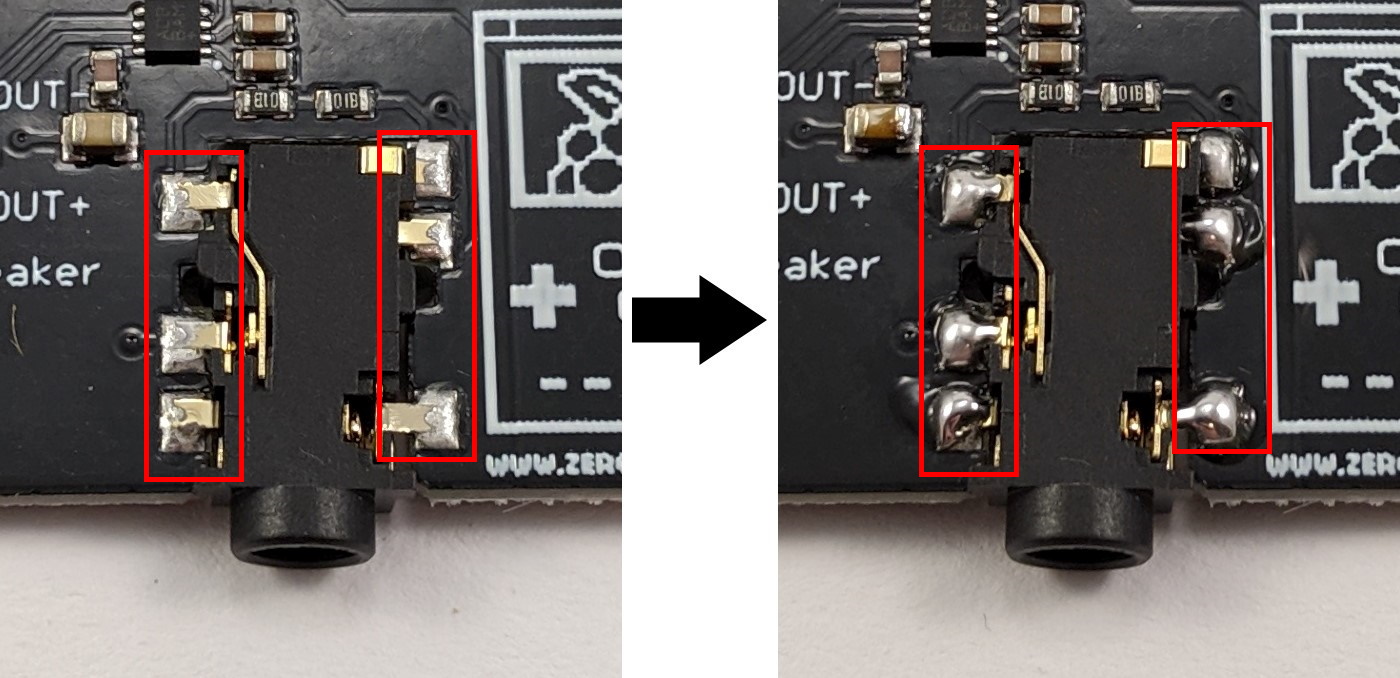
To improve the stability of the headphone jack it makes sense to re-solder it (8a). During production, the six contacts are not always completely covered with solder. If you heat each contact well and add some solder, it improves the durability.
Re-solder battery jack
The four contacts of the battery jack should also be re-soldered so that they hold better on the board. Make sure that there is no short circuit between the narrow connections!
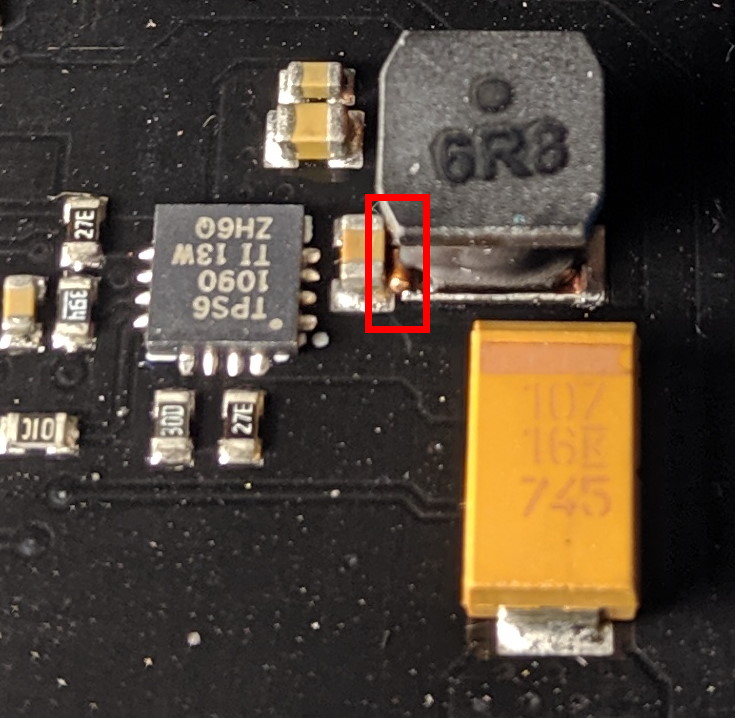
Prevent short circuit (only version 2.3)
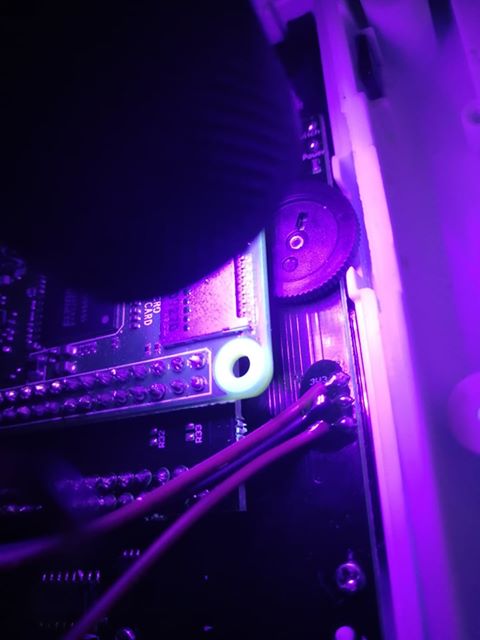
During the production of the boards (only version 2.3), it may happen that two specific components (a capacitor and a coil) move very close to each other, so that a short circuit threatens. All boards are tested before shipment and no short circuits were detected. However, in order to avoid problems during operation due to mechanical stress, the two components should be kept at a distance by insulating tape, Kapton tape or non-conductive adhesive. Concerned is the following location:
Optional: joystick
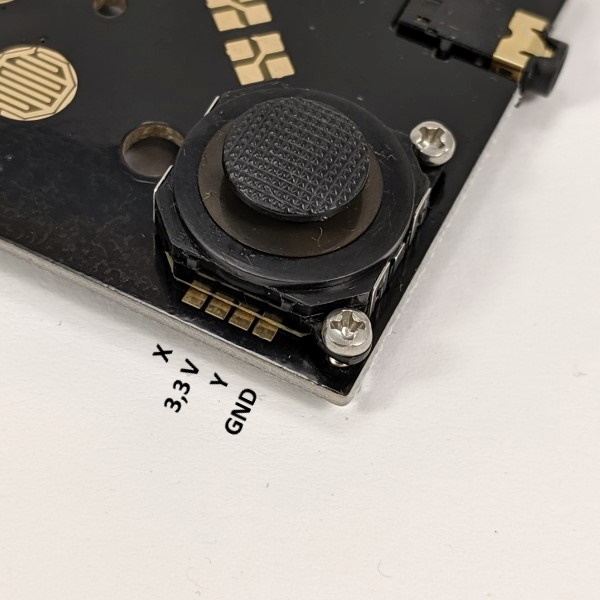
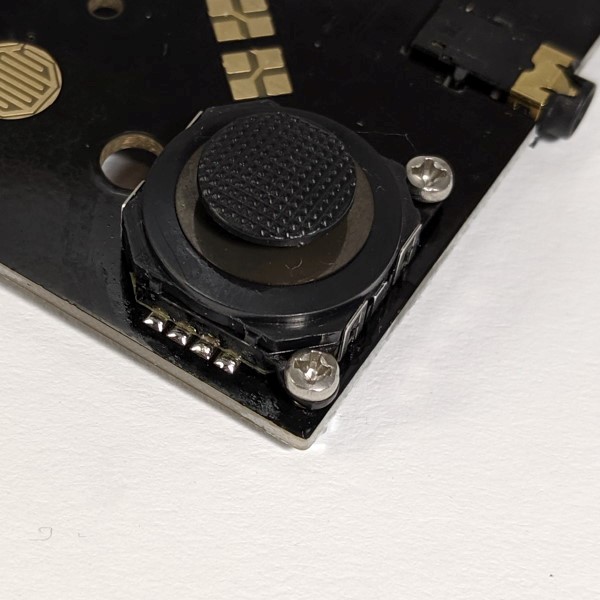
First, screw the joystick with two M2 screws and nuts on the board (10a). Tighten the screws slightly, otherwise the brackets will break on the joystick. Then solder the four solder pads (10b). Flux is very helpful to get the solder between pads and joystick.
If you have problems with soldering, it can help to first coat the pads on the board and on the joystick with a thin layer of solder. When screwed together, the soldering should then work well with flux.
Do not use hot air for soldering, this will damage the joystick!
After soldering, use a multimeter to check that there is no short circuit between two adjacent pads. The resistance between two pads should be at least 1 kΩ.
The joystick must be calibrated and activated before use. How to do this is described here.
If the joystick later sits too deep in the case and grinds, you can simply put a piece of thick paper in the hole of the cap and thus raise the joystick a little.
Case
Make space
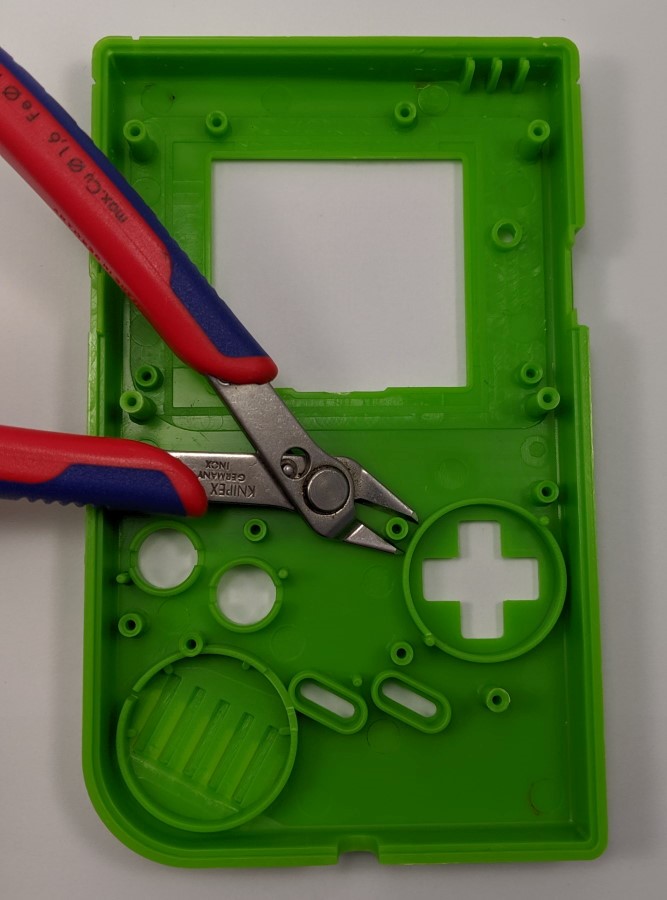
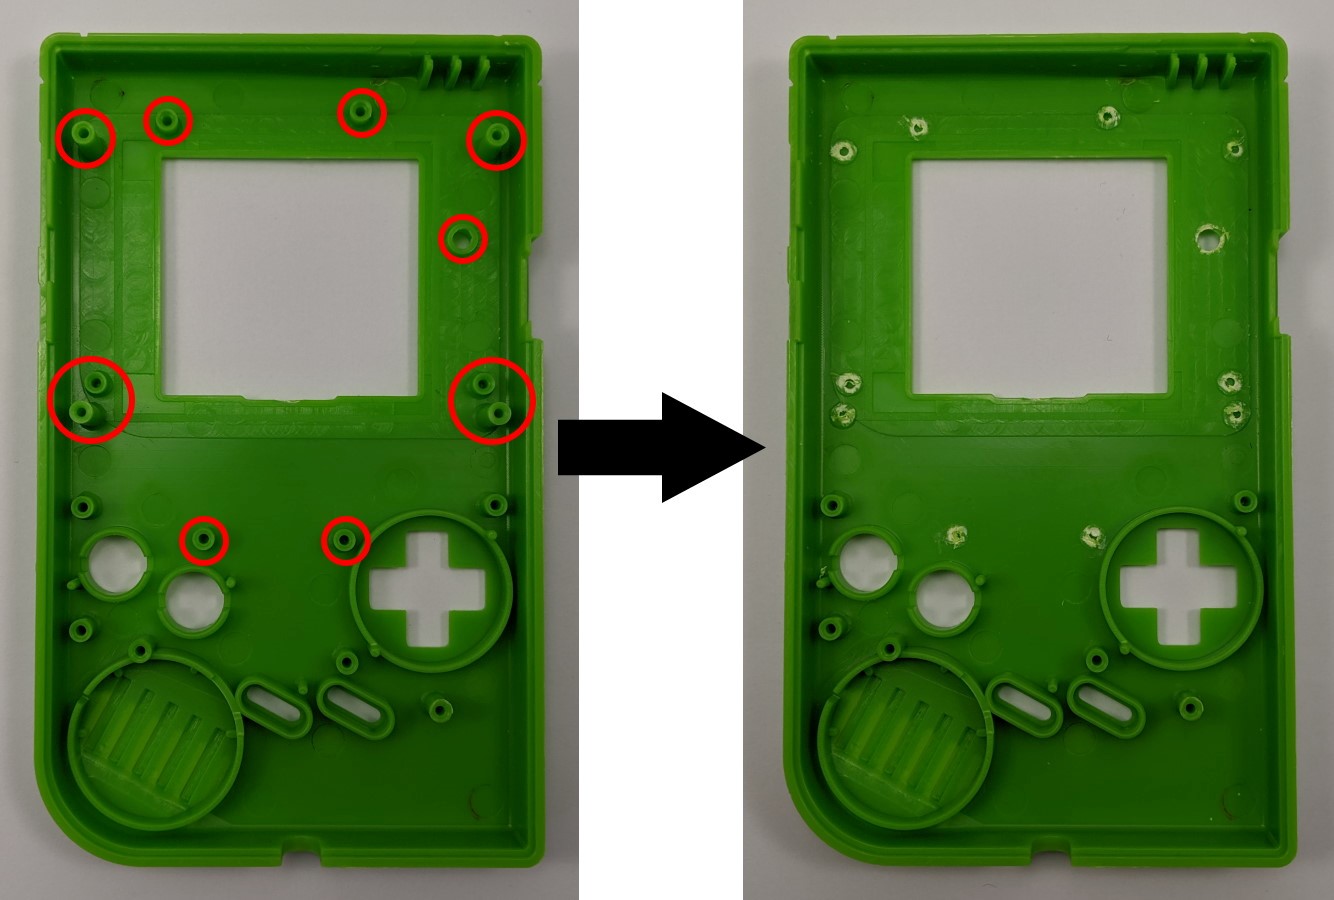
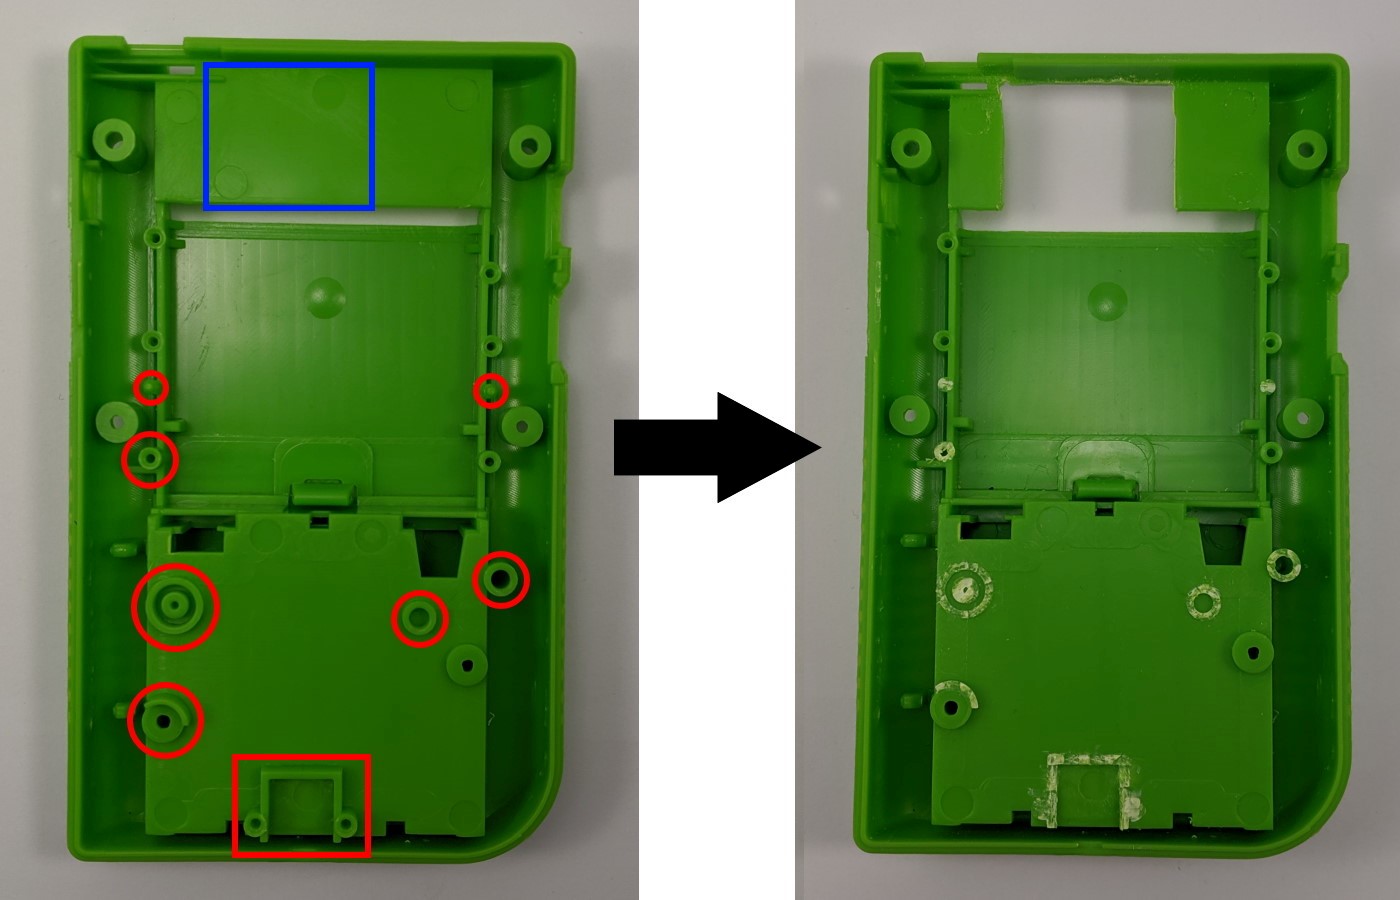
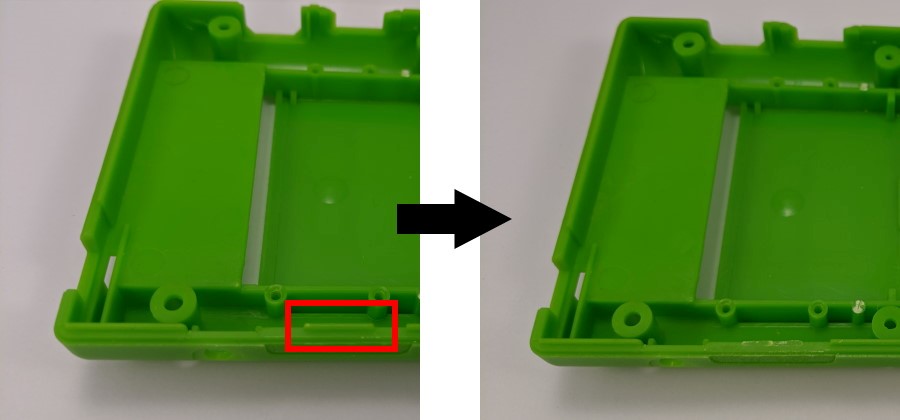
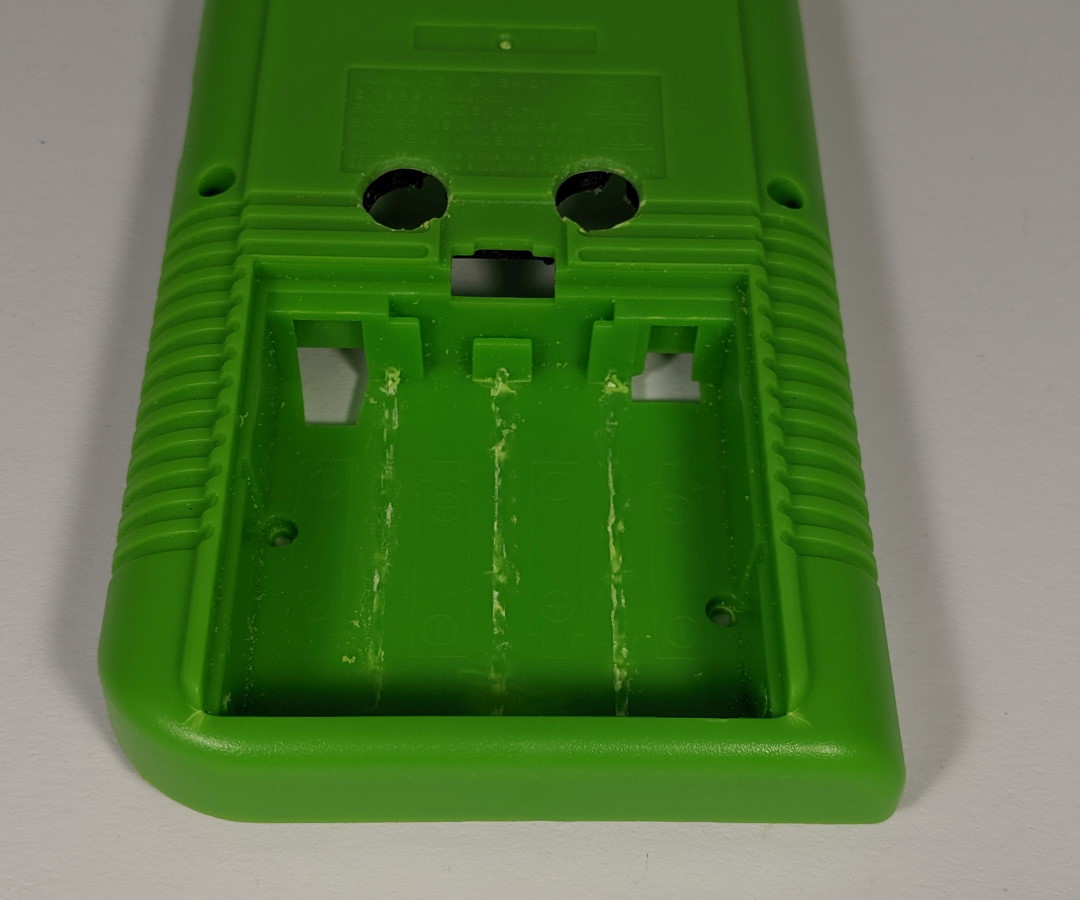
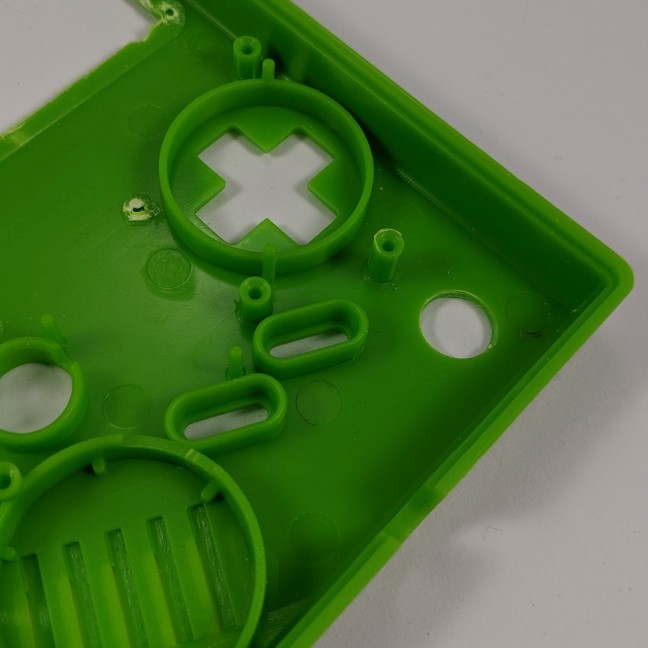
In the original Game Boy case, there are a number of bars, pegs and supports that need to be removed for daddelkischde 2. Most can be broken out with flat-nose pliers or can be removed with an angled side cutter (11a). The remains can be removed well with a file.
Remove the parts marked red in the following pictures (11b + 11c). If you use the printed cartridge with air outlet, also remove the blue area (11c).
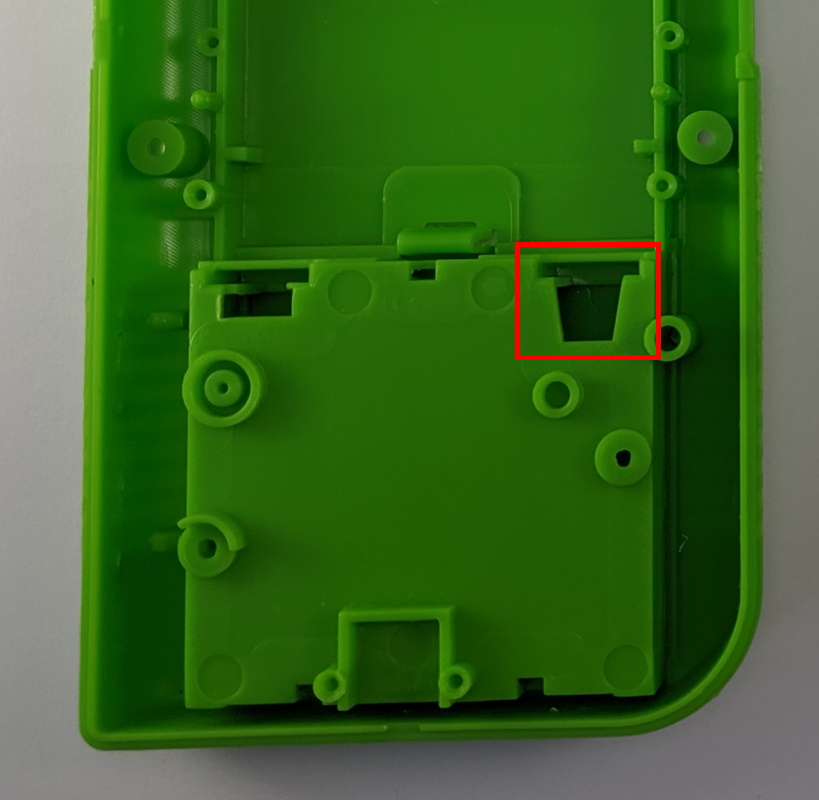
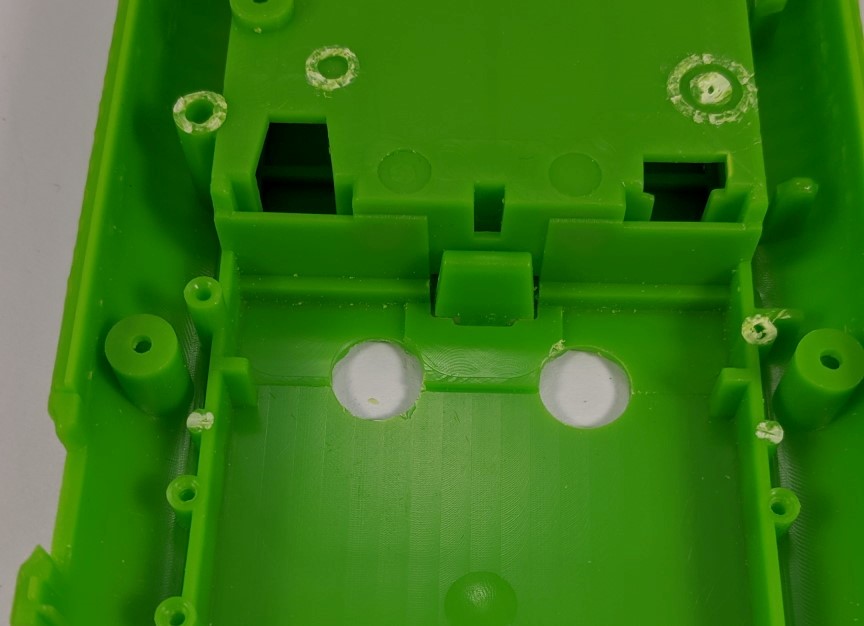
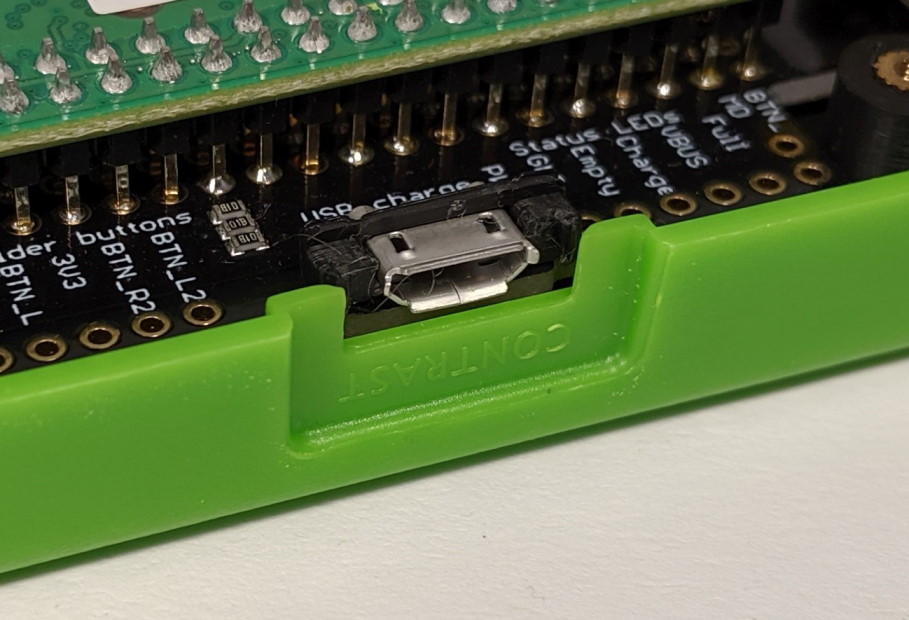
At the opening for the micro USB port is a bridge, which should also be removed (11d):
Depending on manufacturing variations, it is also necessary to slightly enlarge the opening for the battery socket (11e). This is easy to do with a small file.
Enlarge display opening
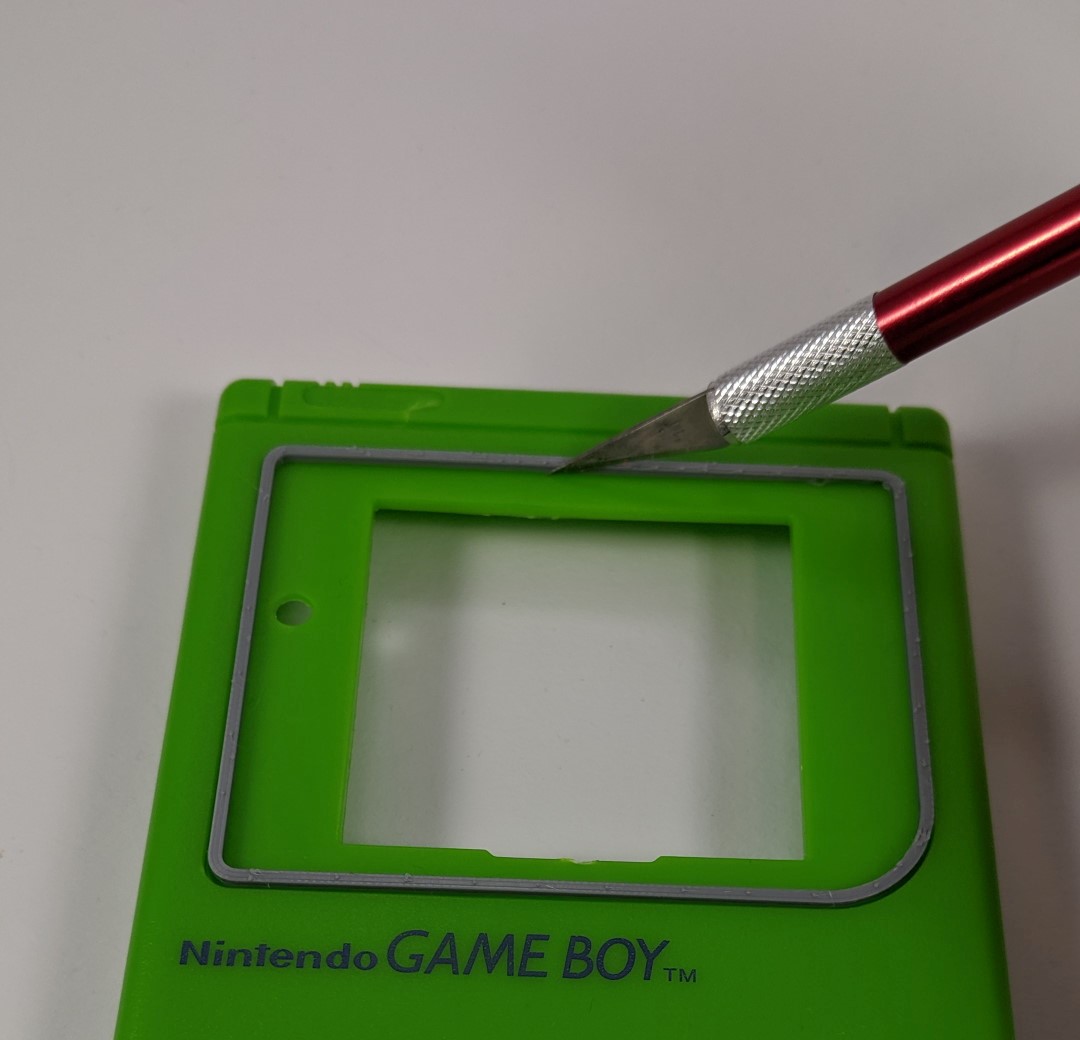
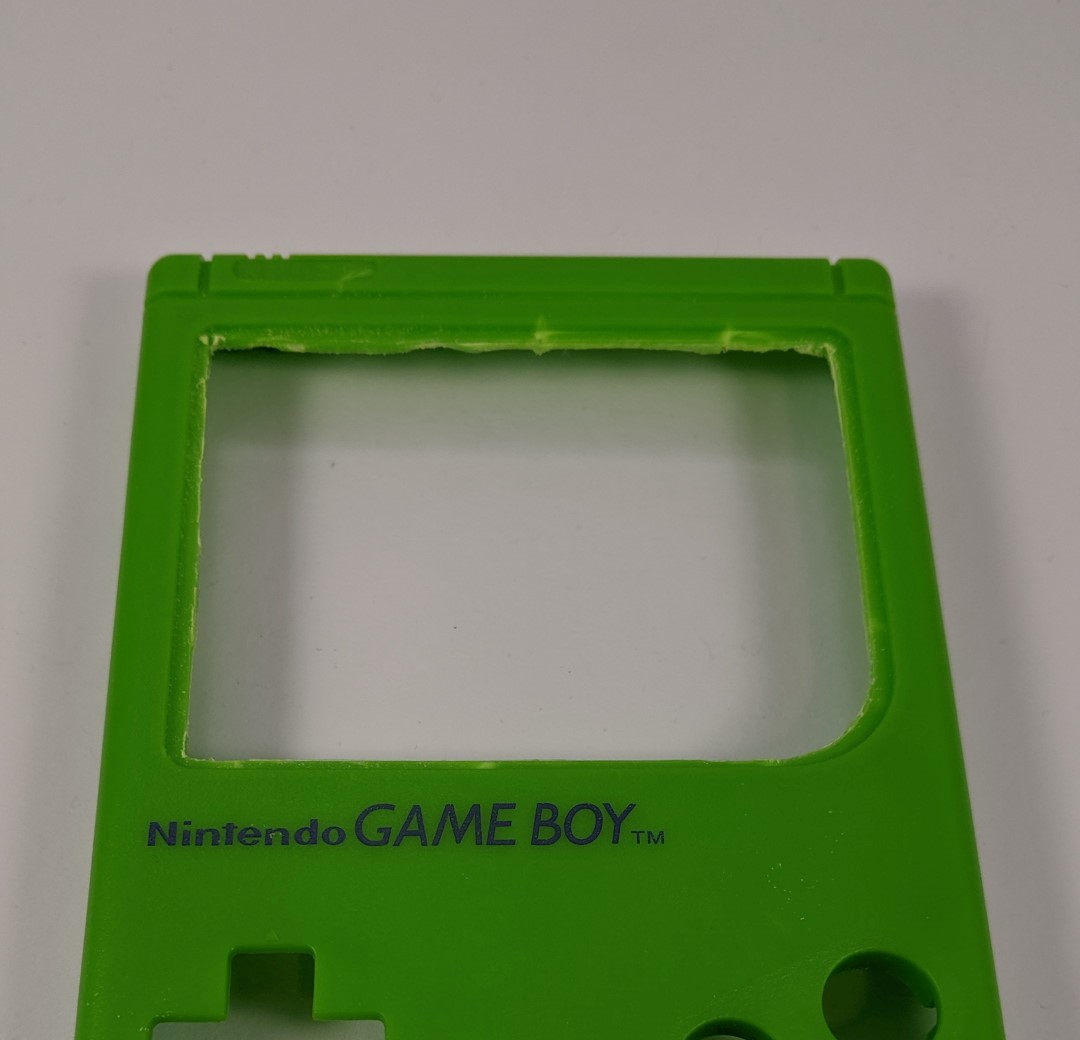
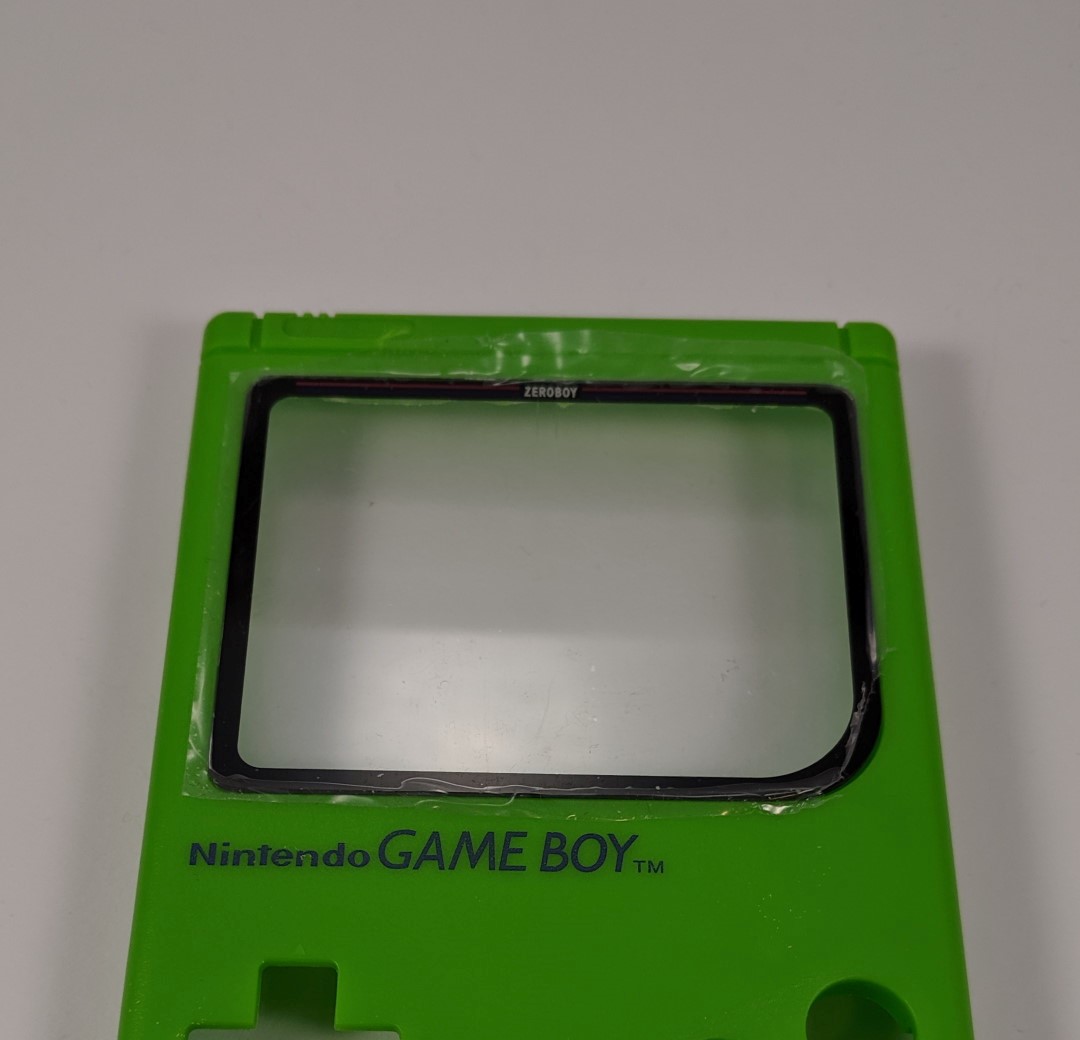
The opening for the display must be enlarged so that the entire display is visible. This can be done well with a Dremel. At the same time, you should leave enough margin to avoid cutting too far. After the rough preliminary work with the Dremel the rest can be worked on with a file, so that a straight edge results. It does not feel tragic if the edge does not look perfect. The screen protector covers this later.
Alternatively, you can use a carpet knife and ruler to dig furrows into the plastic, and then simply break out the edges (12a + 12b). The sharp edges are then smoothed with a file. There is a template for this at the downloads.
The display glass should not be glued in yet, so it does not scratch during further work. It should be glued at the very end. But you can already put it in to check whether the cut fits (12c).
Enlarge battery tray
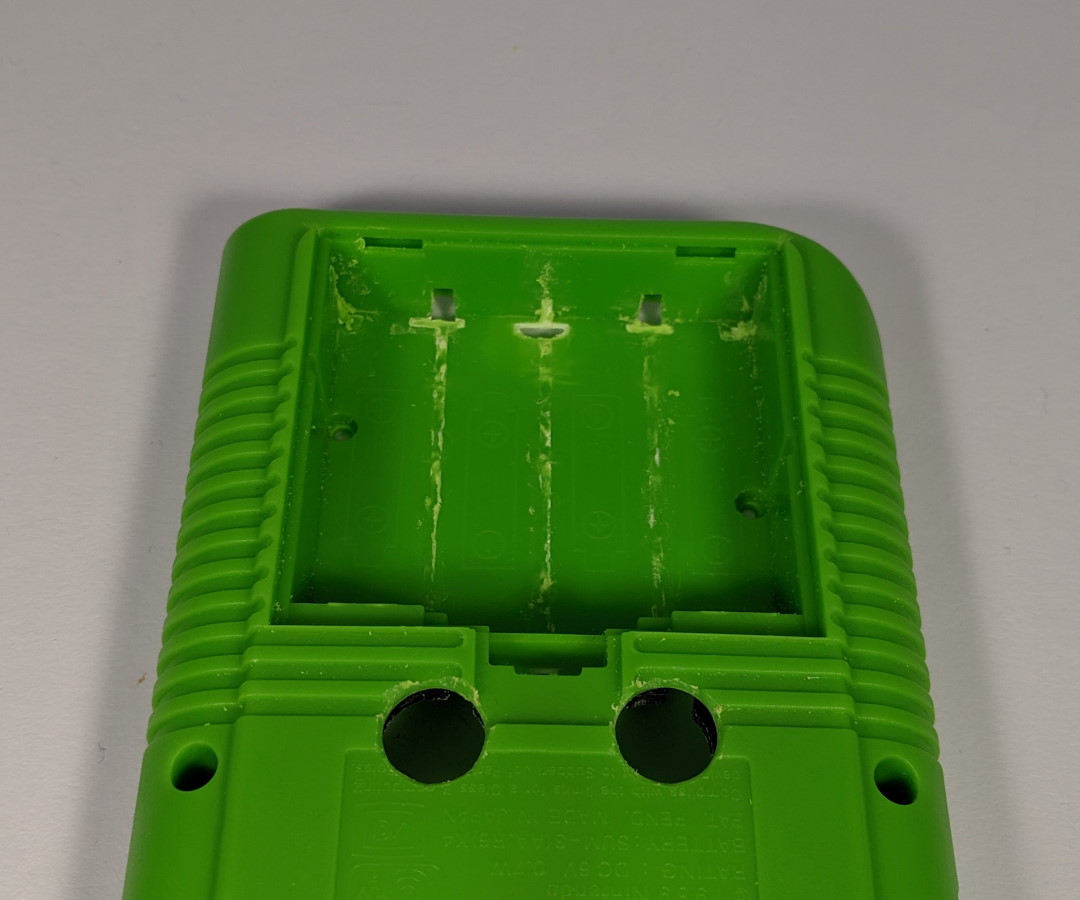
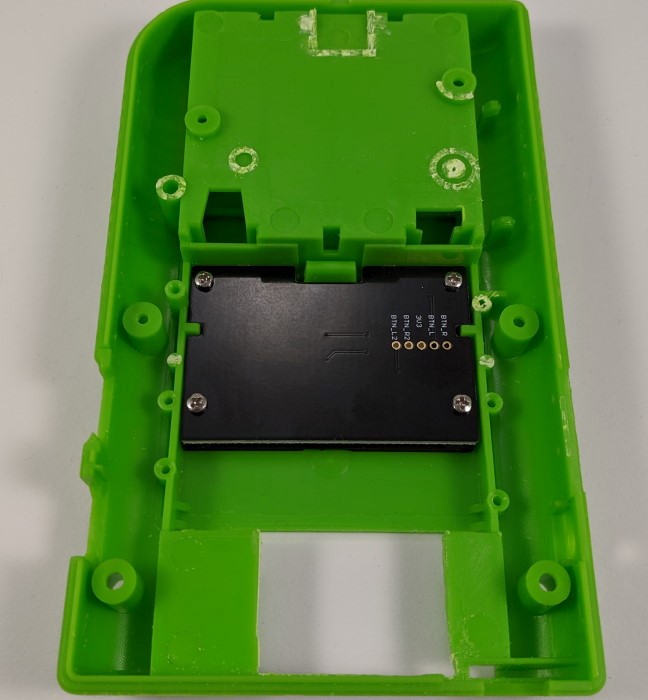
Depending on what kind of battery you use, it is necessary to remove the bars in the battery compartment (13a + 13b). If the battery is very long, it may also be necessary to remove the side panels.
The battery should fit well in the battery compartment and have a few millimeters of space to the sides. The battery can expand during operation and while charging. If he does not have enough space, it threatens to explode and catch fire!
Drill holes for X, Y, Z and C
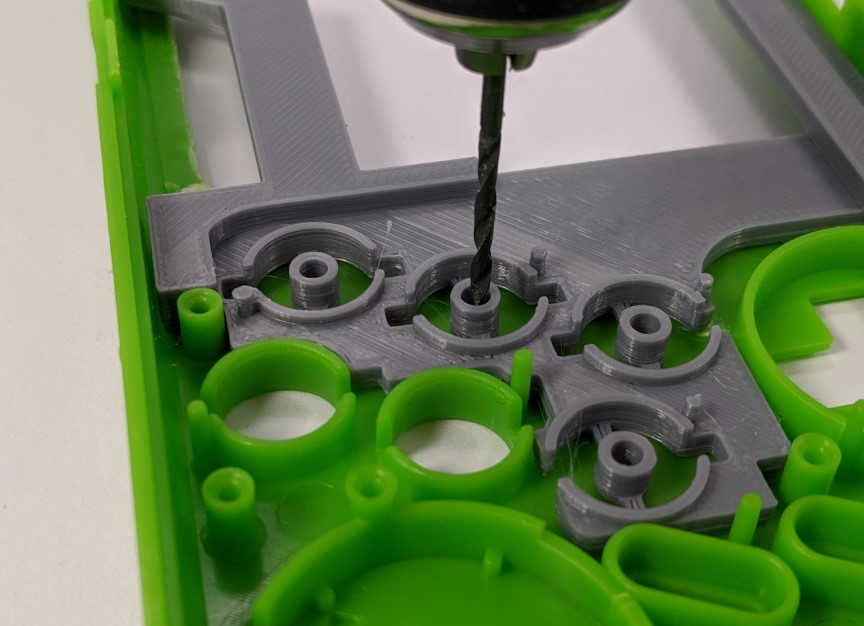
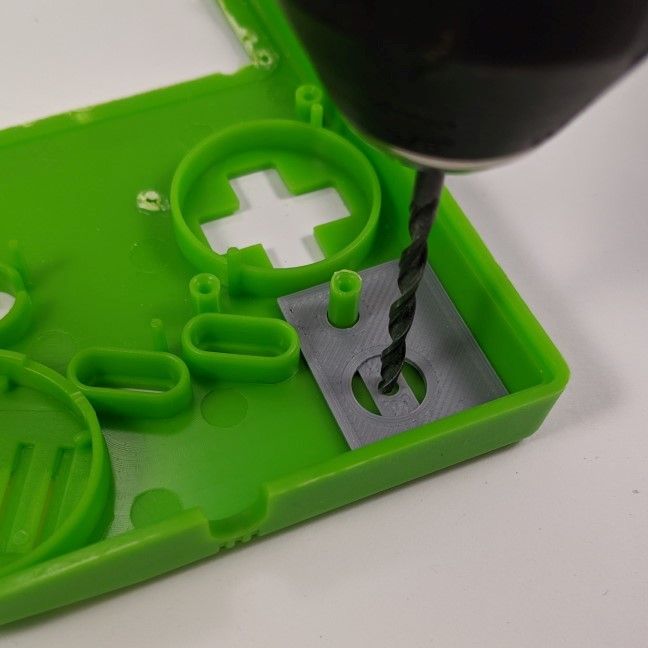
The X, Y, Z and C buttons require additional holes in the front of the case. The display holder features breakout drill guides so you can drill the holes in the right place. It is up to you how many buttons you want to use and how many holes you want to drill. For example, only a few systems require the C and Z buttons (Nintendo 64 and some Sega Mega Drive games). We definitely recommend X and Y, e.g. for Super Nintendo and PlayStation 1.
Place the holder (do not glue it yet!) in place and drill a small hole with the drill guide (14a). Use a drill with little play in the drill guide to really drill in the middle.
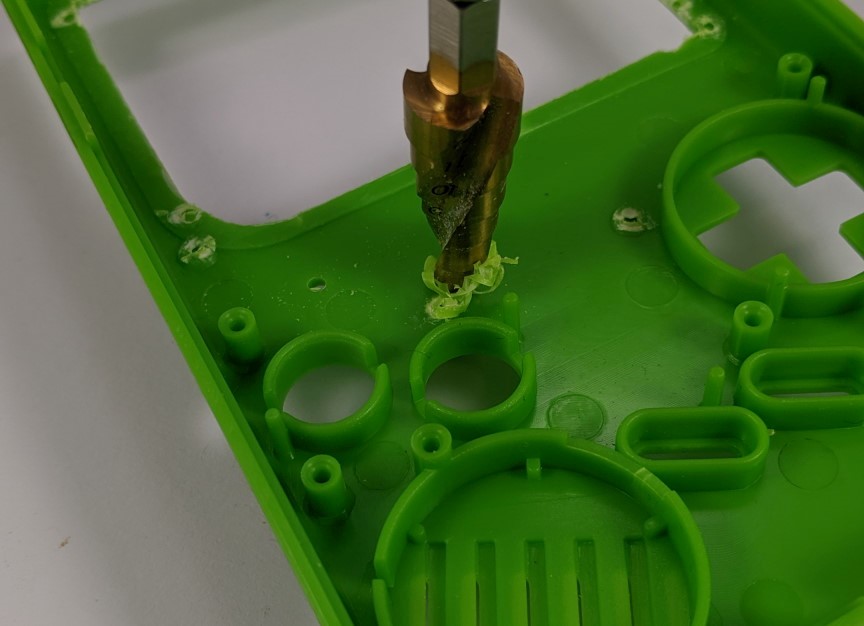
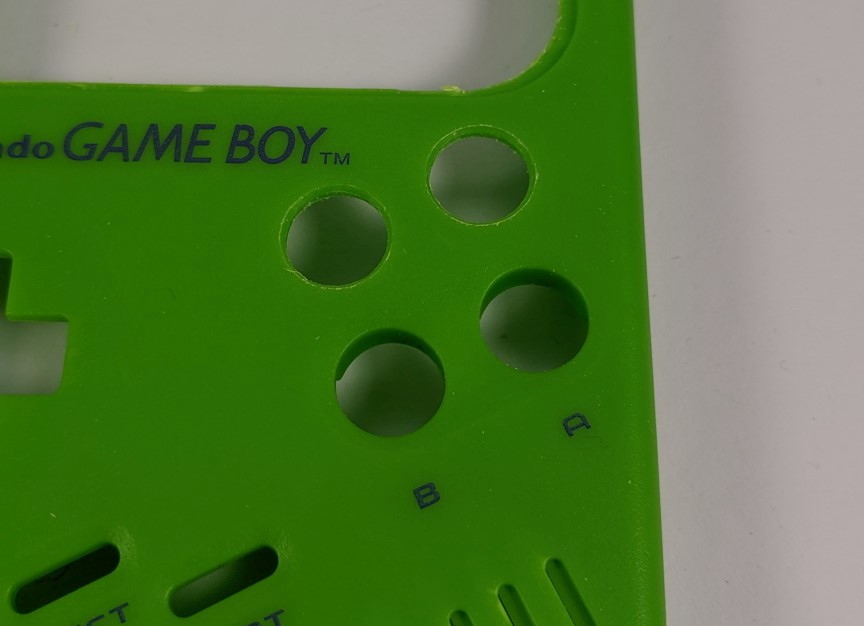
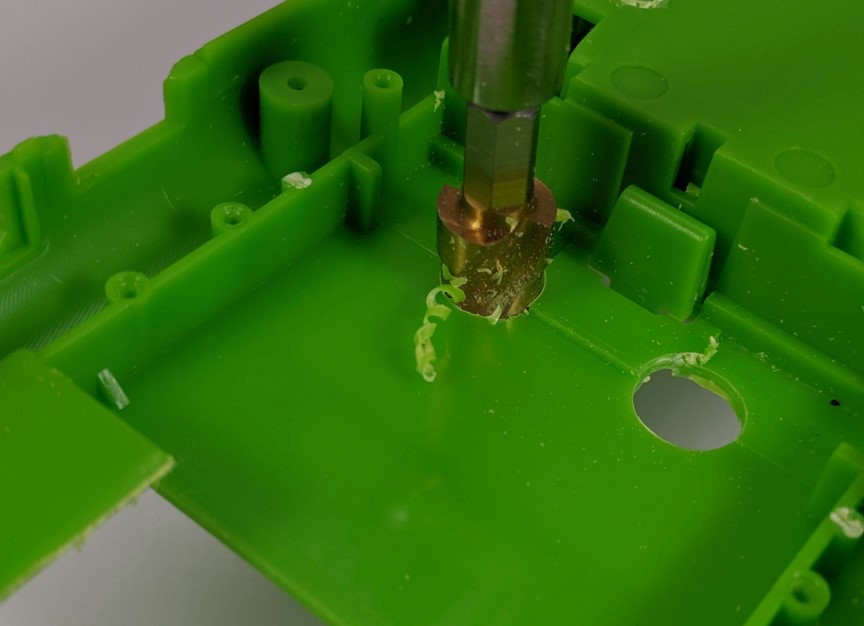
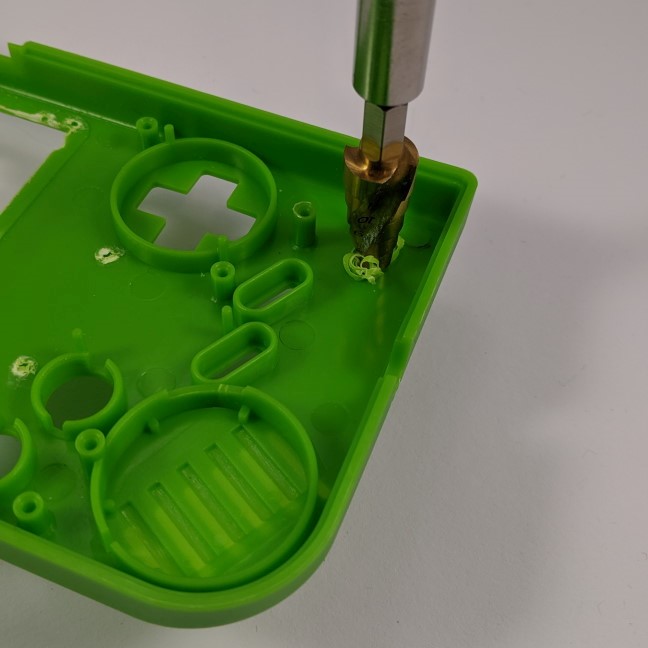
Now you can take out the holder again. Use a step drill and drill the holes to 11 mm (14b). With a countersink you can deburr the holes from outside and inside (14c). Then the buttons will not hang and it looks nice too. The drill guides can then be broken out. The remainders should be filed off, so that the buttons do not grind later.
Drill holes for L, R, L2 and R2
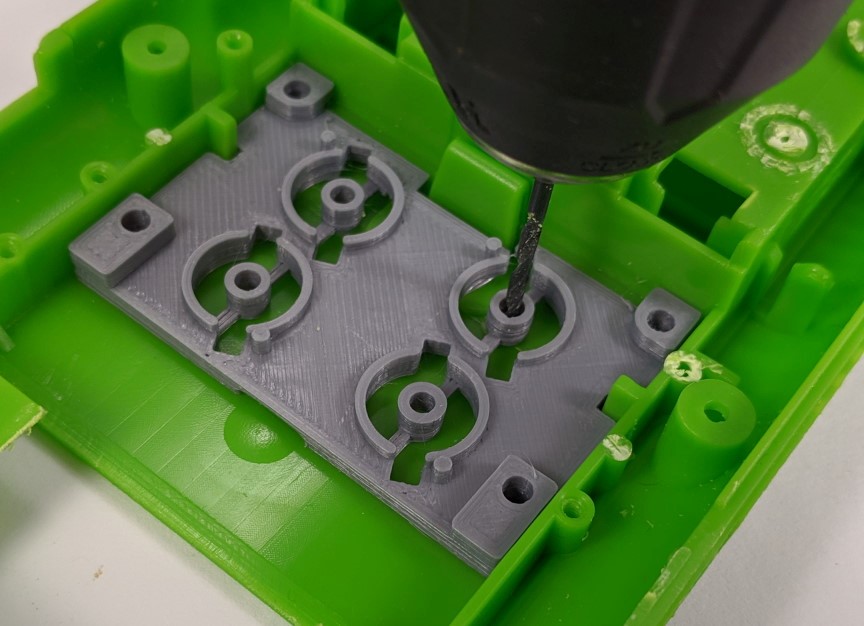
Drilling the holes for the L, R, L2, and R2 (shoulder) buttons works the same way as the front buttons. Again, you can decide how many buttons you need. We definitely recommend using L and R. L2 and R2 are e.g. required for the PlayStation 1.
Place the shoulder key holder in place and drill through the drill guides with a suitable drill (15a). Remove the holder and use a step drill to drill the holes to 11 mm (15b). Again, the holes should be deburred with a countersink from the inside and outside (15c).
Optional: drill hole for joystick
Insert the joystick drilling template into the case (16a). The template is included if you bought the joystick in the shop. A retaining pin in the case is used for exact alignment. First drill a hole in the middle with a small 3 mm drill bit. Then use a step drill to enlarge the hole to 10 mm (16b + 16c).
If you later put the finished board in the housing, the cap must be removed from the joystick (16d). Once the board is screwed into the case, you can put the cap back on it (16e).
Board for L and R
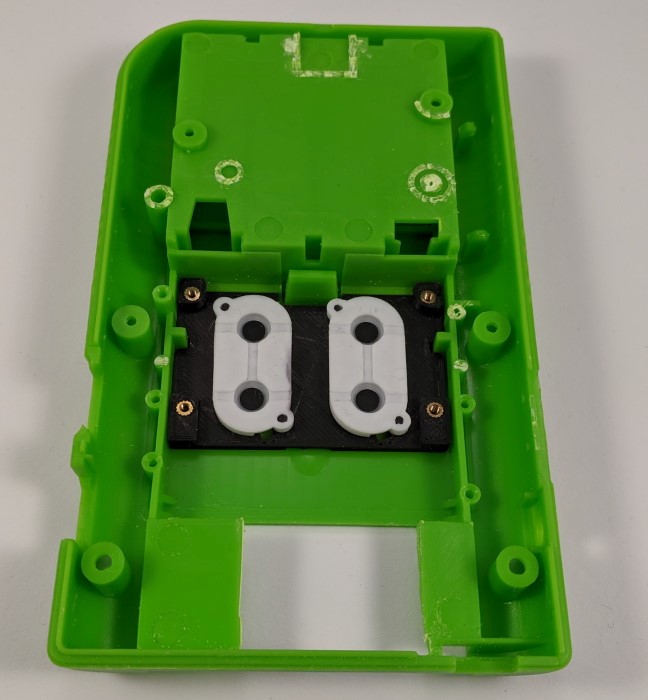
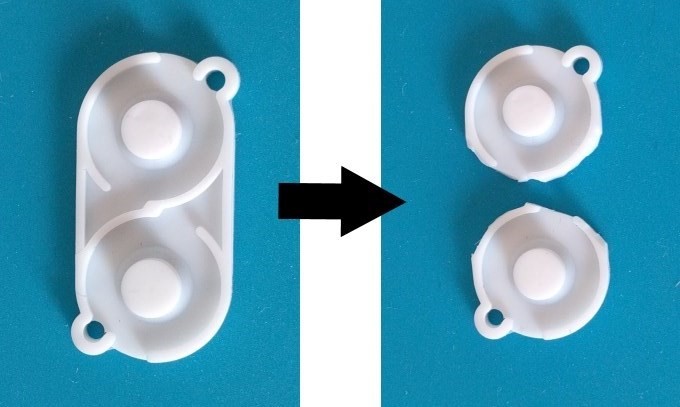
When the holes for the shoulder buttons are drilled and the drill guides are removed, the shoulder button holder can be glued. If you use all four buttons, you will need two double pads. You can insert these directly without editing (17a). If you use only two buttons, and do not want to insert two pads, you have to cut one pad apart (17c). This works well with a nail scissors.
After the glue has dried, the buttons and pads can be inserted and the board can be screwed down with four M2 screws (17b). It may be necessary to shorten the screws beforehand. Make sure that the screw holes in the shoulder key holder are not too narrow. If there is not enough space, the holder could break when screwed in. It is best to prepare the holes with a tap for M2 or to enlarge them with a 1.8 bit drill.
Gluing
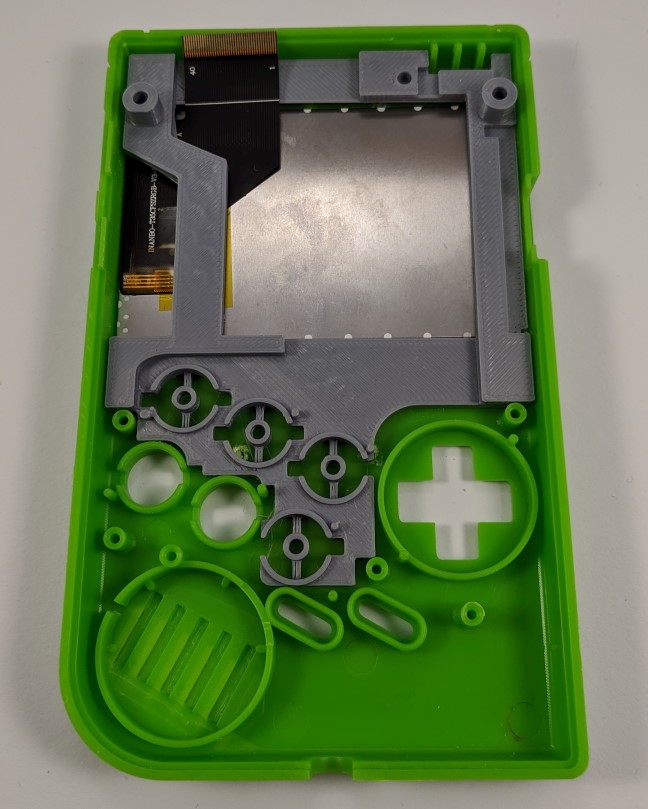
Remove the protective film from the display and insert the display into the shell (18a). Make sure the cable points up. Then use two-component adhesive to glue the display holder in the case. You do not need to put glue on the display, just on the holder. If you use the one-piece display holder, there is now no return, the display cannot be removed after the glue has dried! Make sure that it is in the right place and lying straight.
Insert buttons
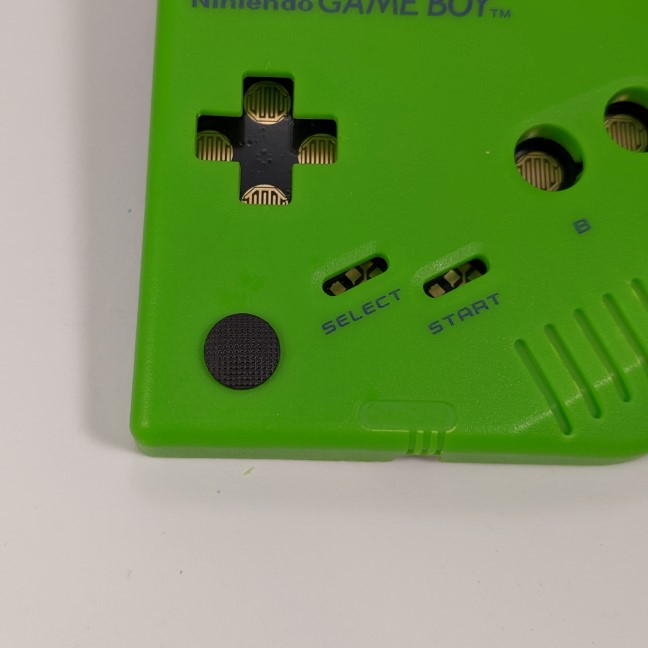
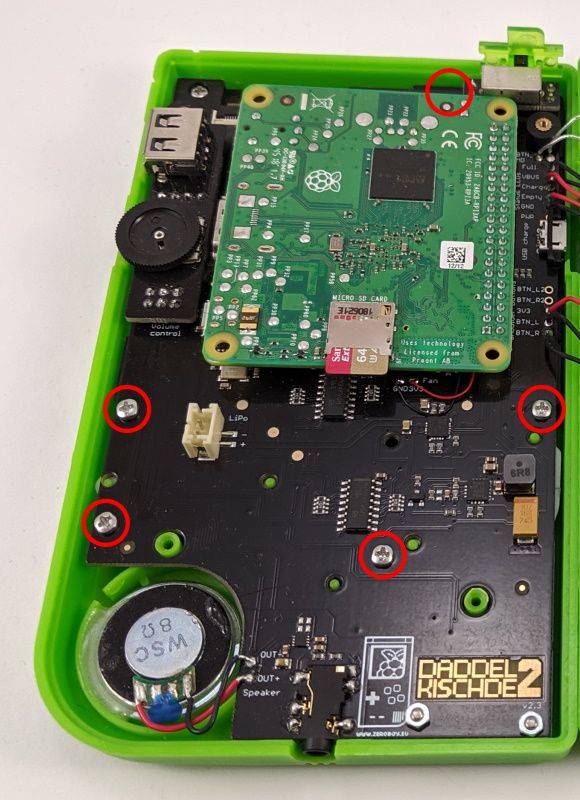
After the glue from the last step has dried, you can insert the buttons and the directional pad. Washers are recommended for a better pressure point of the round buttons (A, B, C, X, Y, Z). Then insert the rubber pads and make sure that they lie correctly on the holding bars. Finally, you can insert the daddelkischde 2 and screw it in with M2×8 screws at the marked positions (18b).
Wiring
The following graphic (19a) and photos (19b + 19c) show how the other components such as speakers, USB, fan, LEDs, mode button and shoulder buttons are connected.
LEDs
Optionally up to four LEDs can be connected:
- LED device on: Lights when the on/off switch is "on" and the board is receiving power
- LED battery empty: Lights when the battery voltage is 3.2 V or less
- LED battery charging: Lights when the battery is being charged via the micro USB socket
- LED battery full: Lights when the battery is fully charged and a power adapter is connected to the micro USB port
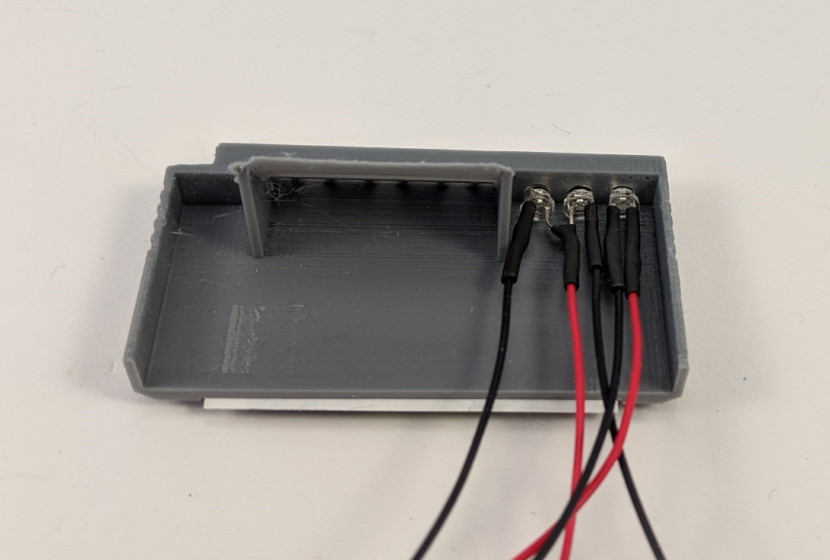
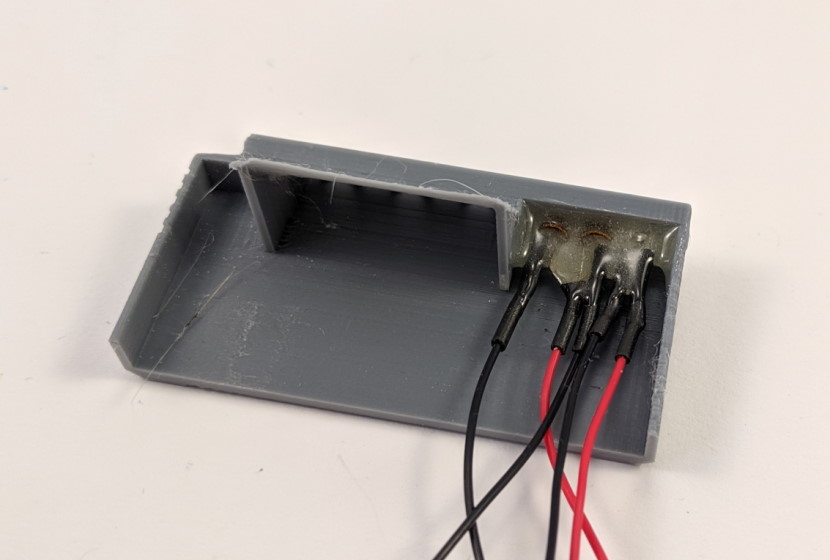
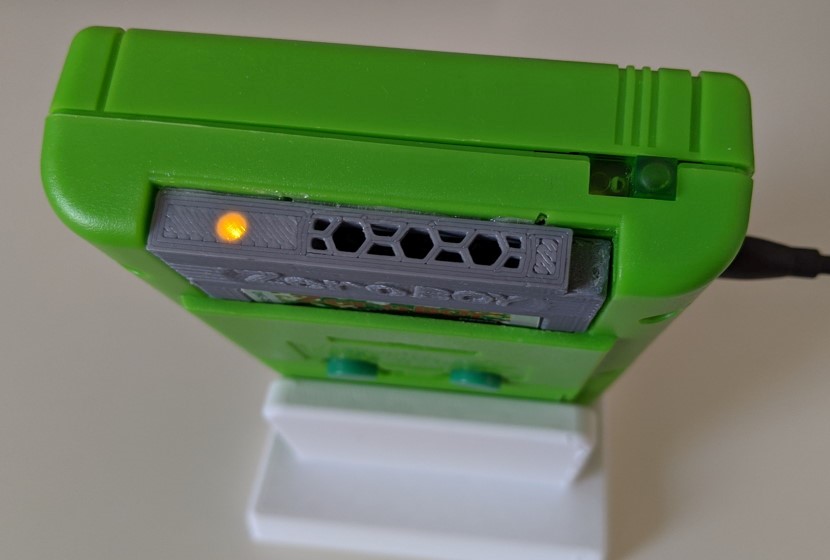
The LEDs can be placed anywhere. We recommend using our dummy cartridge and housing the LEDs in it.
Pay attention to the correct polarity when connecting the LEDs. Some LEDs are connected to the corresponding pin with their anode (+, longer leg), others with their cathode (-, shorter leg) (see diagram wiring). The resistors for the LEDs are already present on the board.
Display
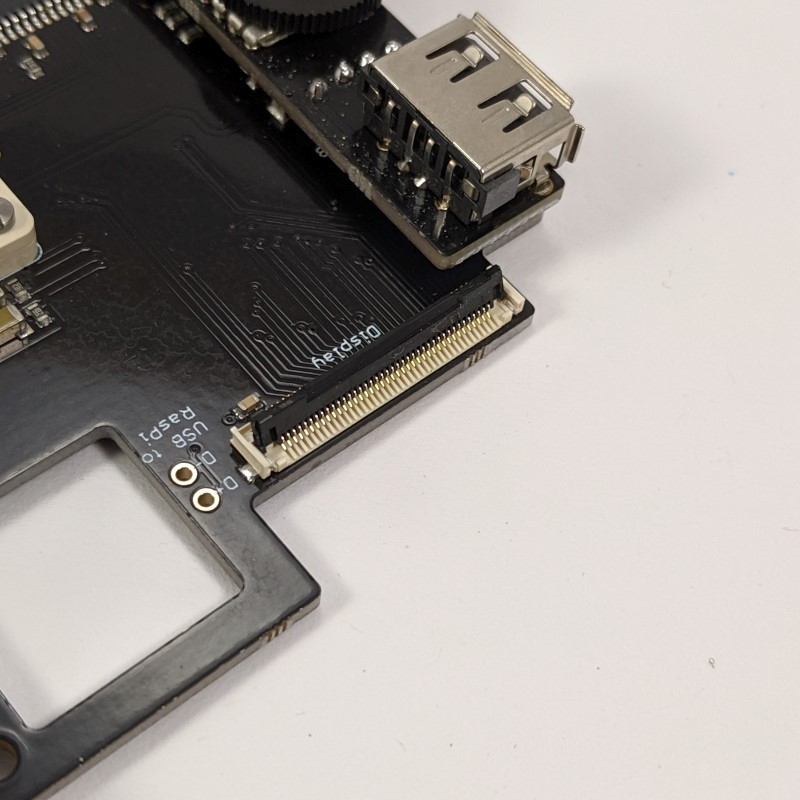
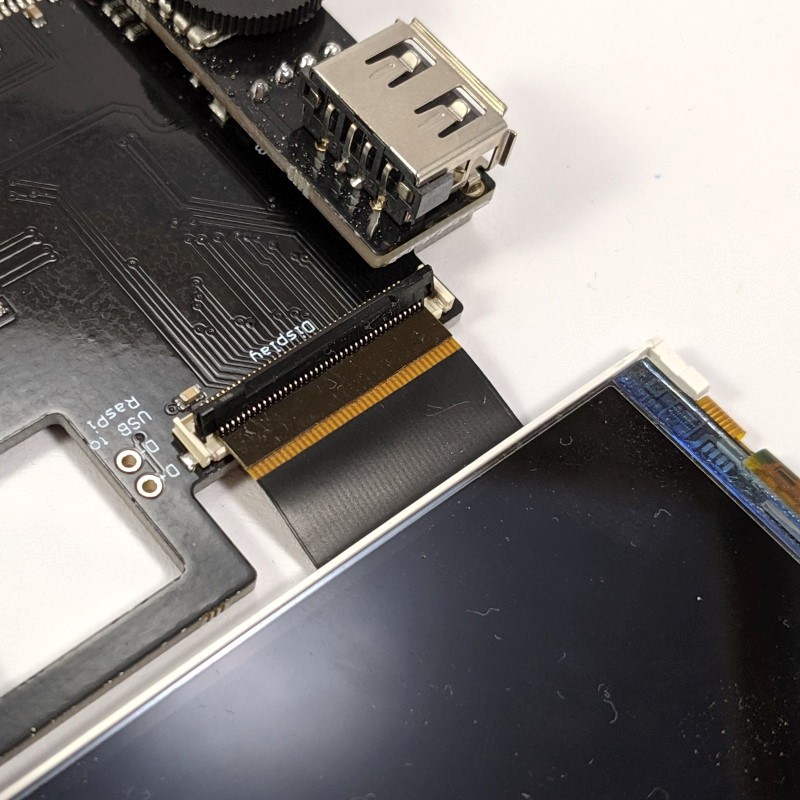
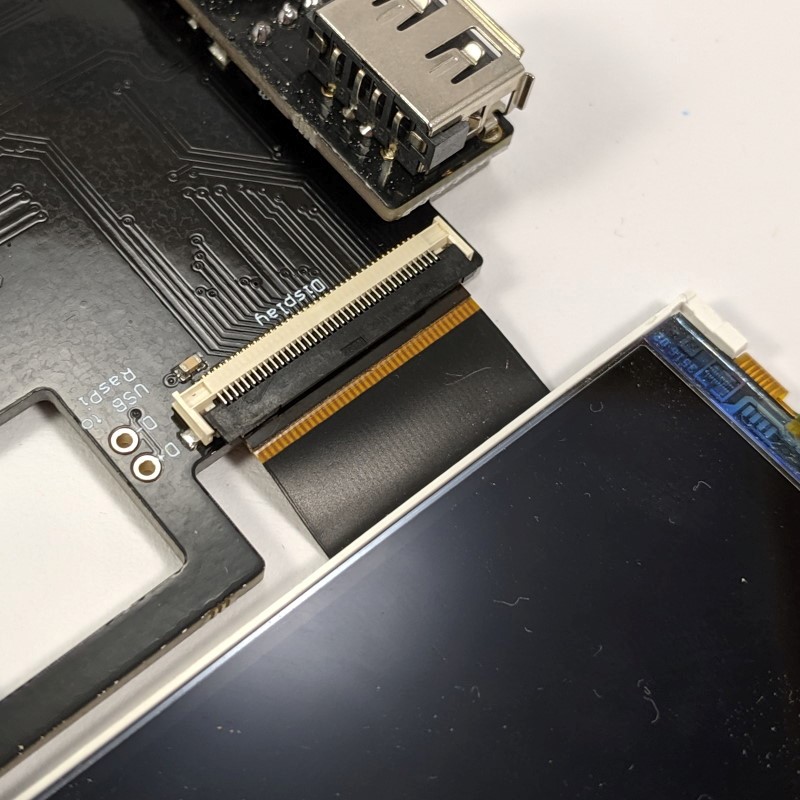
Once the board is screwed into the housing, you can connect the display. To do this, fold the holder upwards on the socket (20a), insert the ribbon cable in the center and up to the stop (do not press too hard) (20b) and then fold down the holder to fix it (20c).
By the way: As soon as everything works, you can use the key combination L + R + up to increase the brightness of the display. It is reduced with L + R + down. The button combo can also be changed. This is explained here.
Shoulder buttons
Connect the shoulder buttons (L, R, L2 and R2) with wires to the corresponding solder joints on the outer edge of the board. If you only use L and R, you can save the wires for L2 and R2. 3V3 must always be wired.
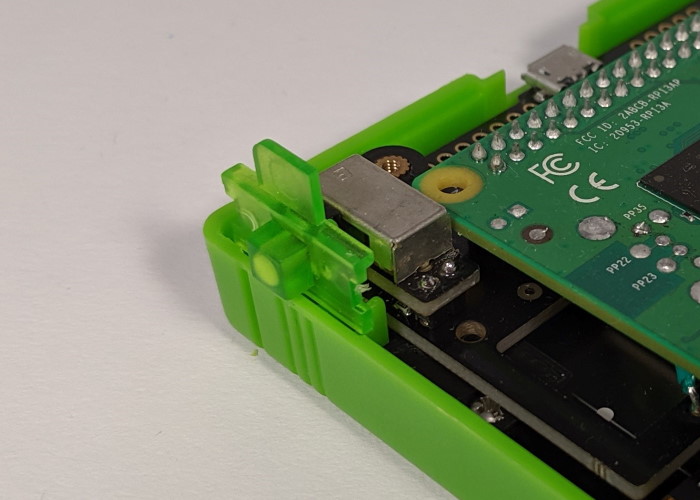
On/off switch
The on/off switch is already in the right position, so you only have to put the cap on it (21a + 21b).
Optional: mode button
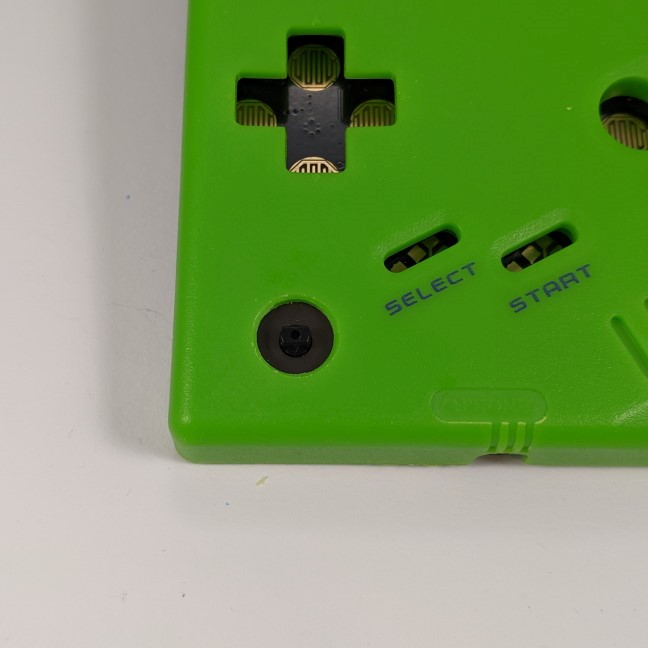
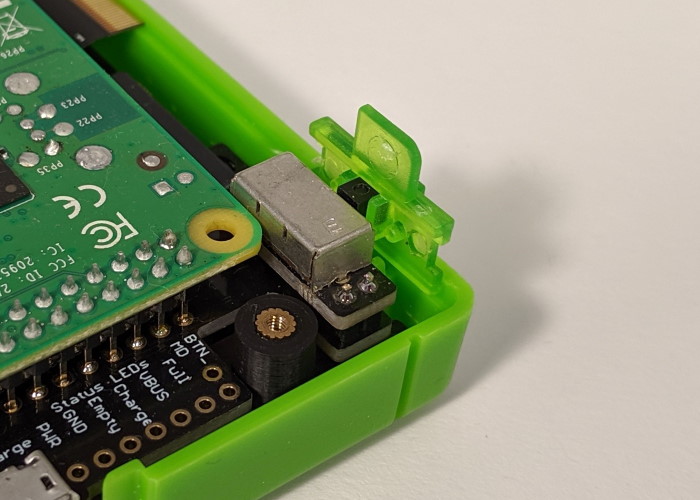
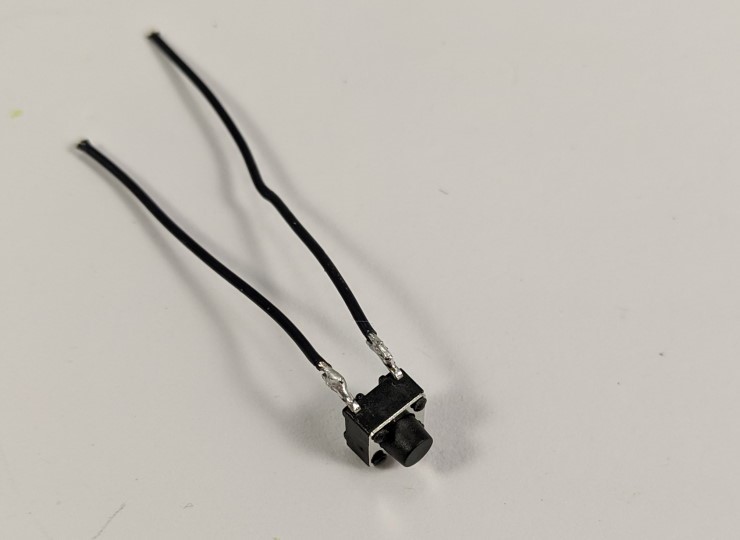
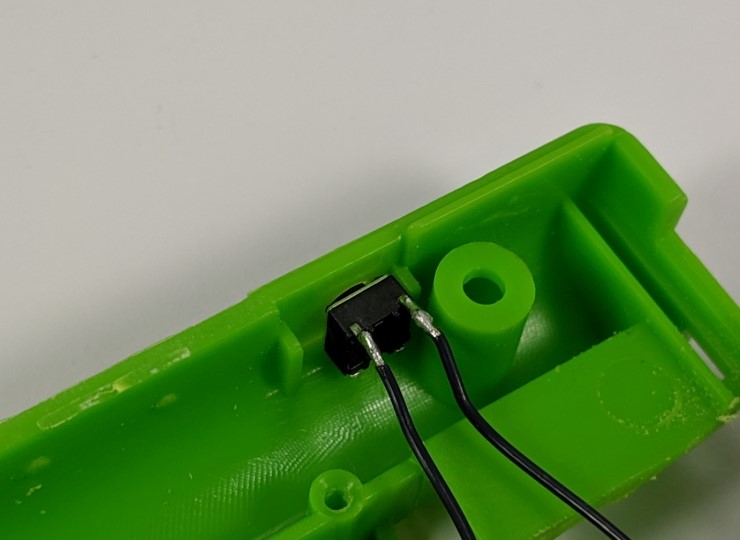
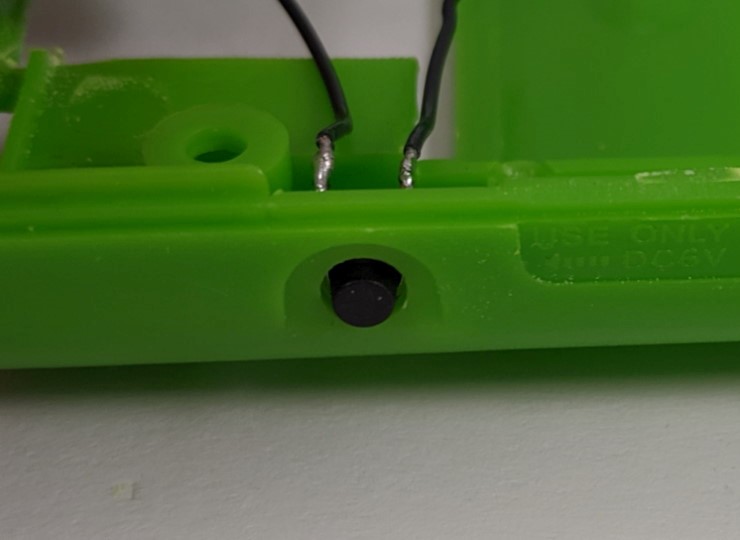
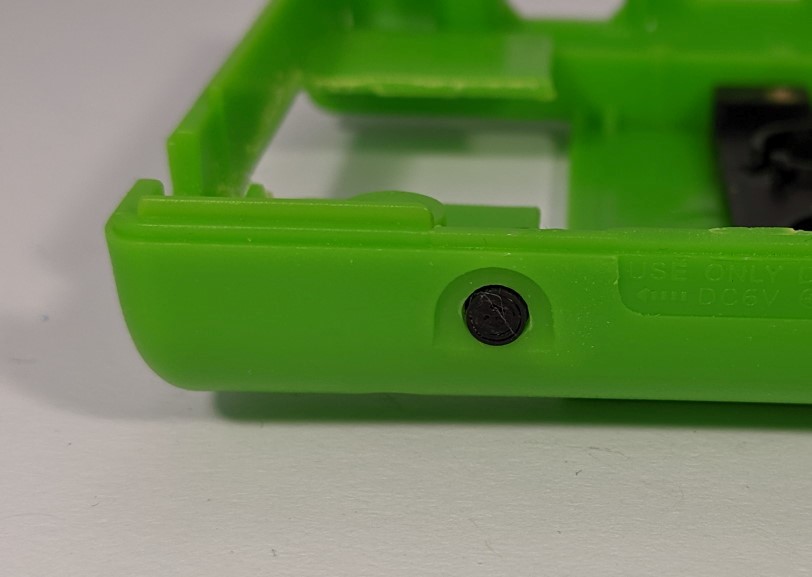
The mode button is another button and can be used as a hotkey to load and save games. You can stick a simple 6 mm high tactile button (22a) into the side round hole (22b + 22c) that served as a charger for the original Game Boy. Solder two wires to it, which are soldered over the connectors for the LEDs to the motherboard.
Close case
When all components are wired, the case can be closed. Make sure that the two halves of the case fit together without much effort.
If the case near the on/off switch cannot be closed perfectly, the wires for the LEDs and shoulder buttons are usually in the way. Lay them so that they don't interfere.
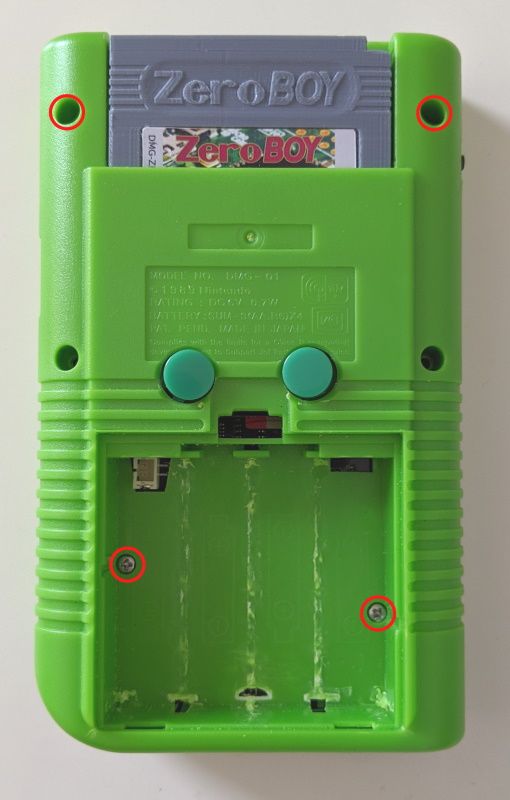
The case halves can be screwed in at the four positions marked in the photo (23a). No screws can be used in the middle.
Tips and tricks
UV glue
With UV glue, you can additionally fix the solder joints after soldering.
Improve the pressure point of the buttons
To improve the pressure point of the buttons, you can use M3 washers (max 6.7 mm outside diameter). There are also washers available for 3D printing in the downloads.
If the D-pad does not work reliably, you can fill the cavities with hot glue.
Optional: dummy cartridge
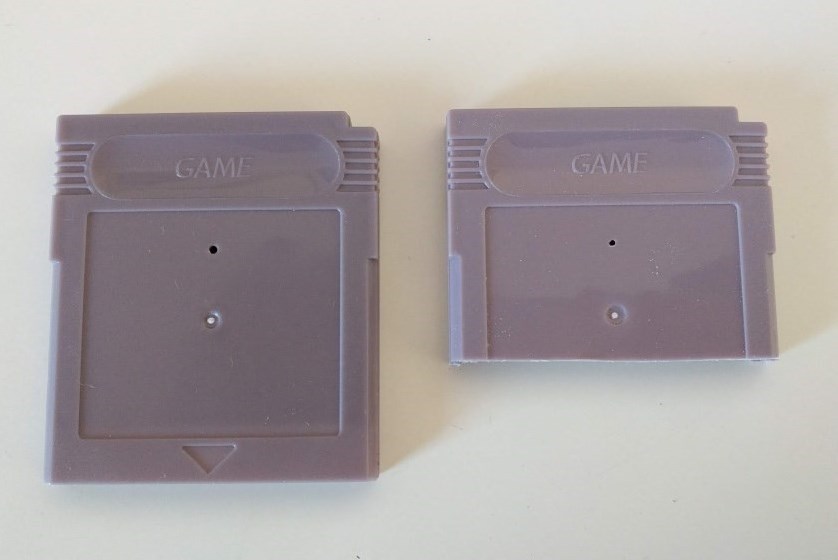
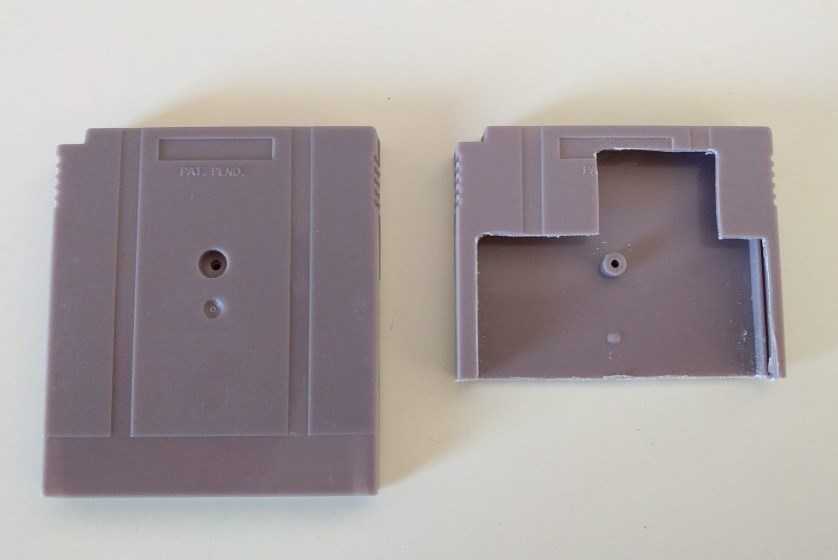
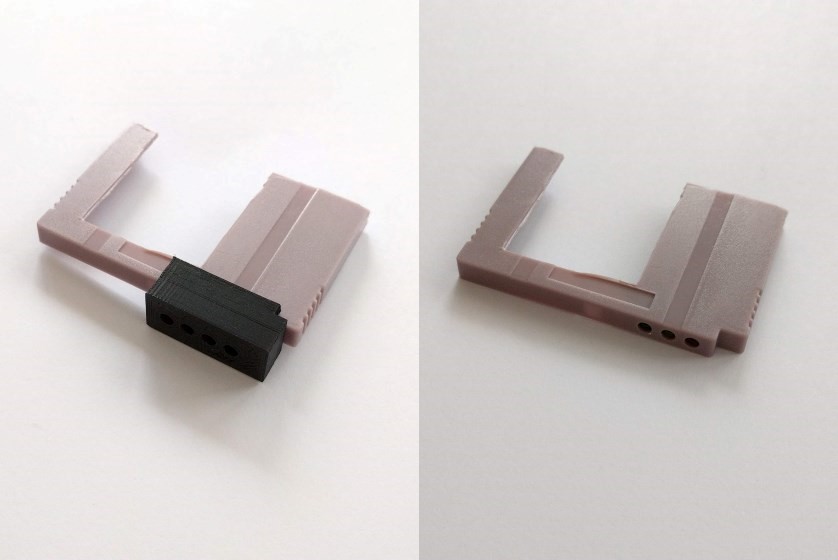
To close the slot for the cartridge on the back, you can install a dummy cartridge. A complete cartridge does not have enough space, the shoulder buttons are in the way. Therefore, the cartridge must be cut (25a + 25b). Use an empty cartridge, which you edit with a Dremel and file so that it is open on the inside. You can then decorate it with a sticker and glue it firmly to the case.
The cartridge offers itself to accommodate the LEDs there. In the downloads you will find a drilling template, with which you can easily drill parallel holes in the top of the cartridge (25c).
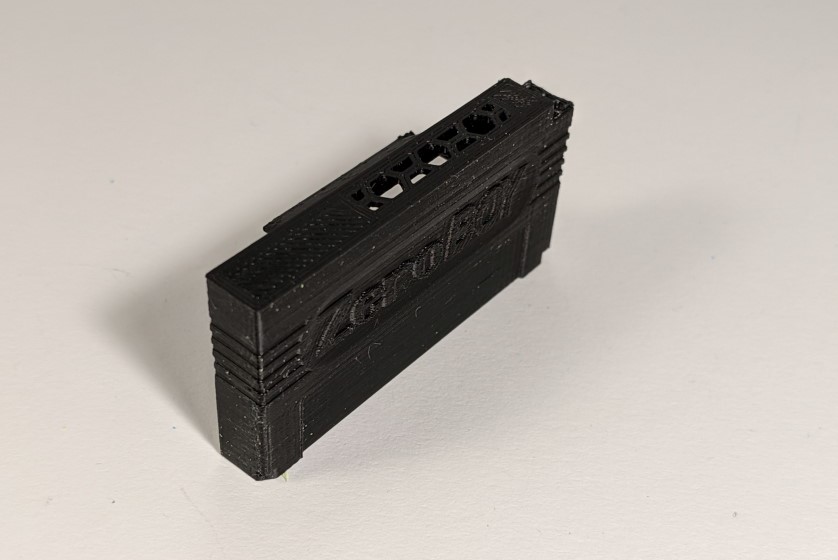
If you have a fan installed, it is important that the warm air can escape from the case. We designed an air-vented cartridge for 3D printing that you can find in the downloads (25d). It also has three recesses in which you can glue flat head LEDs (25e + 25f + 25g).
Optional: close the barrel plug hole
The round hole in the case, which was used with the original Game Boy for a power supply, is superfluous if not used for a mode button. In the downloads you will find a small barrel plug, with which you can close the hole (26a).
Optional: micro USB cover
The opening for the micro USB plug is larger than necessary. Again, there is a micro USB cover in the downloads to reduce the opening. You can glue it directly onto the board (26a).
